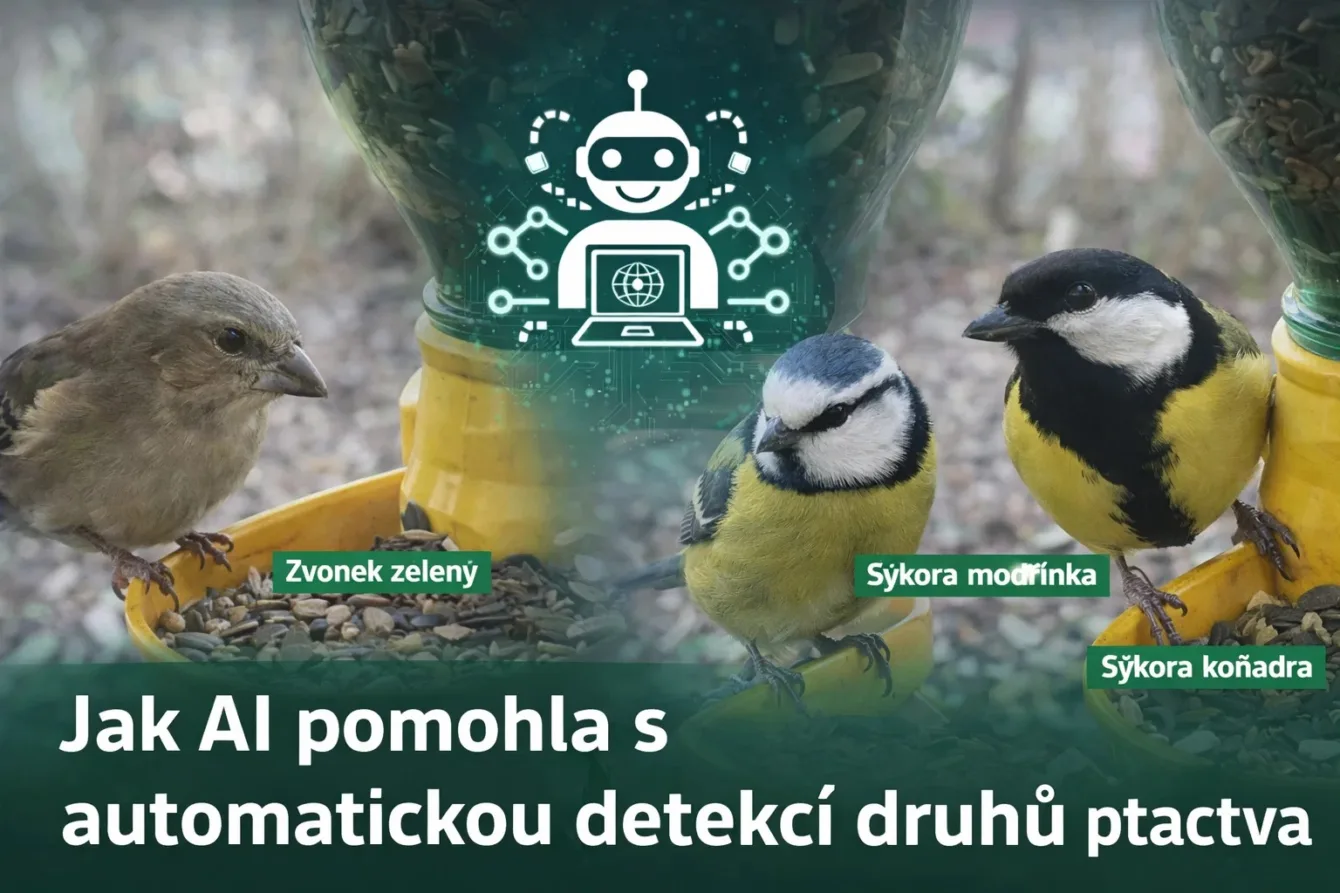
Detection of objects, animals, or people. This can now be easily accomplished thanks to AI. Michal Ševčík wrote this article for his project OnlyBirds – bird detection. The same knowledge can also be applied to detect other animals or objects. Here you will learn how to do it.
The article was written by Michal Ševčík, author of the projects TMEP.cz, ŽivýObraz.eu, and OnlyBirds.cz.
Thank you for the article.
OnlyBirds.cz is a website that displays photographs of birds from an industrial camera. It is interesting for its very good photo quality. However, it could be improved with bird detection. And why not try AI? And since I will be using AI, it could also write this article. How to do it and how complicated is it?
The whole project has a simple logic.
The website OnlyBirds.cz displays birds at the feeder. The photographs of the birds are captured by a camera that sends the images to an FTP server.
Camera
The camera is a ready-made solution from Hikvision, specifically the Hikvision DS-2DE2A404IW-DE3/W. The fact that it is a PTZ camera with great zoom capabilities has proven to be a huge advantage. I often tried different levels of zoom and scene framing. Initially, I wanted to go with some RPi (preferably the more economical Zero), but at the same time, I wanted the highest quality photos and after an hour of searching, I gave up.
Either the camera was not compatible with the board or with the software I wanted to use. I didn’t want to deal with one-liners across half a screen and hope everything would run smoothly. Here it was hassle-free (apart from the empty wallet) and the photos were already going to the server.
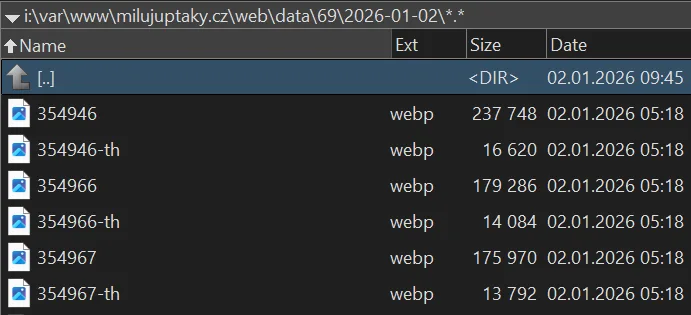
Sorting Photos on the Server
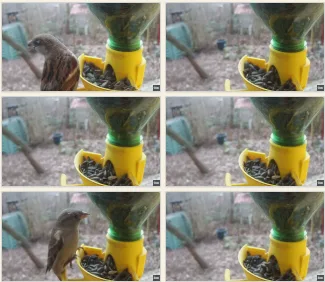
So we have the images on the server; a script periodically checks the upload folder and sorts the found photographs into folders by the day they were taken + generates a thumbnail. I open a page with all thumbnails in better resolution, scroll through, mark the photos I want to keep + those that I think stand out in quality I mark as TOP. I then delete everything else.
And I do this almost every day. It’s quite relaxing; after a few such days, it goes quickly, and I also know what is happening at the feeder.
AI Comes In
However – we are in the 21st century, AI is everywhere, how to automate this? And add new functionality because of it? And also statistics?
I preferred a local model – it generally seems quite wasteful to send photos to some API. I had thought about how difficult it could be and looked for some ready-made model.
Problems with Using an Existing Model
There were three major problems:
- The ready-made model did not account for our European species and was not trained on a larger number of photographs of all species.
- It is essential that the sample of photographs is as large as possible and captures various scenes. Moreover, if the bird poses differently or is facing away, that also plays a role.
- My scene and camera are set up quite specifically to often capture the largest detail of the bird. As a result, I have an average much larger bird than most others doing something similar, so the data is simply different.
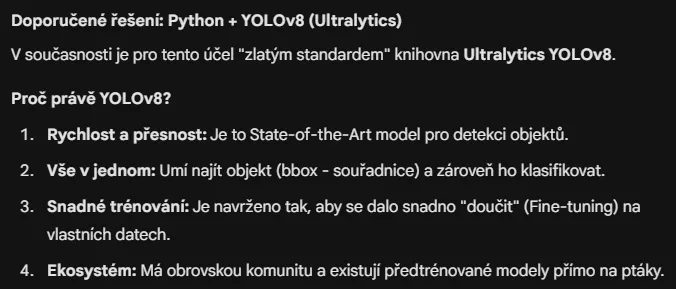
I didn’t delve into it further at the time, but I still had it in the back of my mind that such detection would be nice. Now I returned to it and thought it would be a great task to try out Gemini 3 from Google. It provided a solid foundation:
Training the Model
And gradually it advised how to do it, suggesting to take photos, upload them to Label Studio, label them, export, and train the model.
Everything within the Python packaging ecosystem, so via “pip install label-studio” I installed and subsequently launched the software for annotating photographs, created a project there, set the classes I would detect, and started labeling the photos:

In this way, I labeled over 1000 photographs gradually. Again – once you get the hang of it, it goes relatively quickly, and I found that when I try, I can label 20 birds per minute.
Overall, it took a few hours. For the best results, it is advisable to make the zone with the labeled object as precise as possible, so the rectangle does not unnecessarily cover the surroundings. It is ideal to use keyboard shortcuts, so you press the number/letter of the class, stretch the zone, adjust it a bit, and hit enter to move to the next item.
I then performed the export including the images:
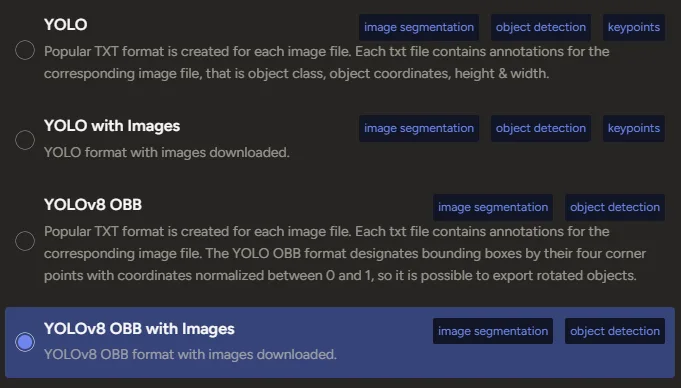
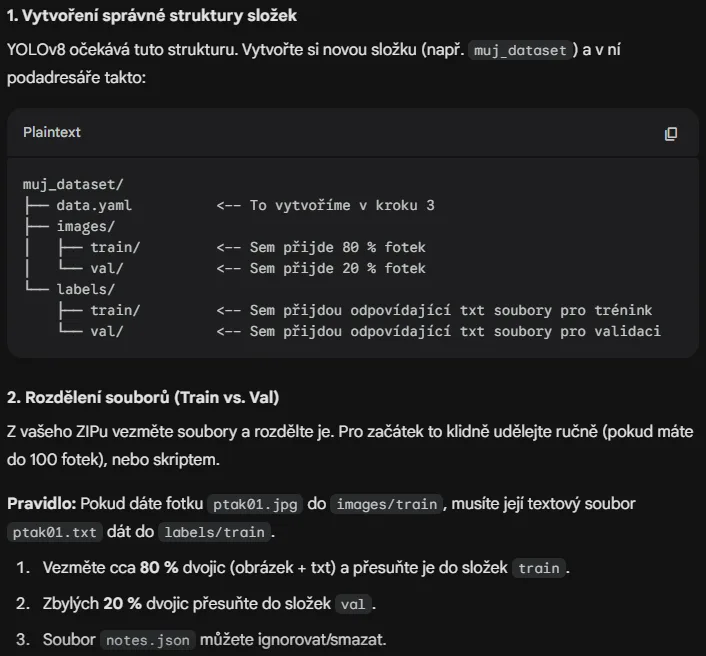
A ZIP file is available for download, containing two folders “images” and “labels” with similarly named files that differ only in extension. These need to be fed to the software Ultralytics (again a Python matter), which expects a specific data structure for training:
Claude.ai for Writing the Script
How to do it? For coding, I use Claude.ai, specifically Opus 4.5 within the GitHub Copilot subscription, and overall, I would not have even attempted this project, let alone completed it, if AI hadn’t significantly helped in everything or done it for me.
On one hand, I feel that with every second of using AI, I am getting dumber because I have to put in minimal effort, but at the same time, I would never find the time for all this. So I asked Opus to create a Python script for sorting into folders. In the next iteration, I also asked it to statistically distribute the photos by classification class so that they are as evenly distributed as possible.
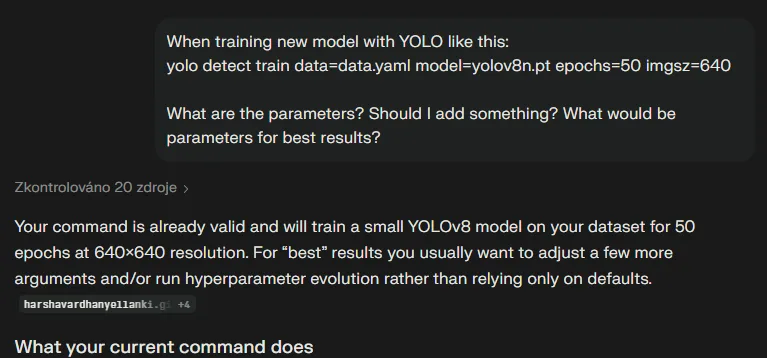
It managed everything perfectly on the first try, so I could start training the model. How to do it was already outlined by Gemini within the free limit, but since I have a subscription to Perplexity (with a code in the action for 30 CZK per year), I asked what the various input parameters for the training command are and how to set it for the best result:
Training the Model with Ultralytics YOLO
This explained everything I was asking about, and I ended up with the command:
yolo detect train data=data.yaml model=yolov8s.pt epochs=60 imgsz=640 batch=16 workers=8 device=0 patience=30
YOLO offers the option to train on multiple models, typically we are interested in yolov8 N and S – nano and small. Nano should be sufficient for running on embedded devices, while small is already a bigger cannon for sparrows (pun intended). Training on CPU (Intel i7 14th generation) took about an hour, while on GPU (GeForce 3080) it took approximately 20 minutes.
AI Writes the Web
As for the web side, it was necessary, and again AI did 95% of the work:
- Create a script for the API that allows returning photos that AI has not processed and simultaneously save the result for the processed photograph.
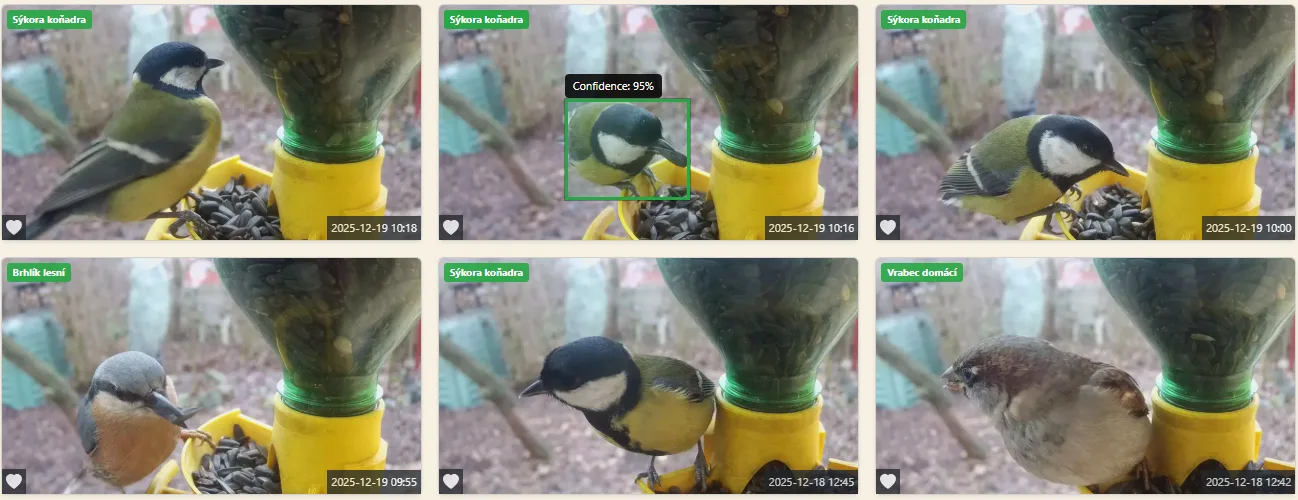
- Add label display on photographs for photos where a bird was detected with a certain minimum confidence level from the model.
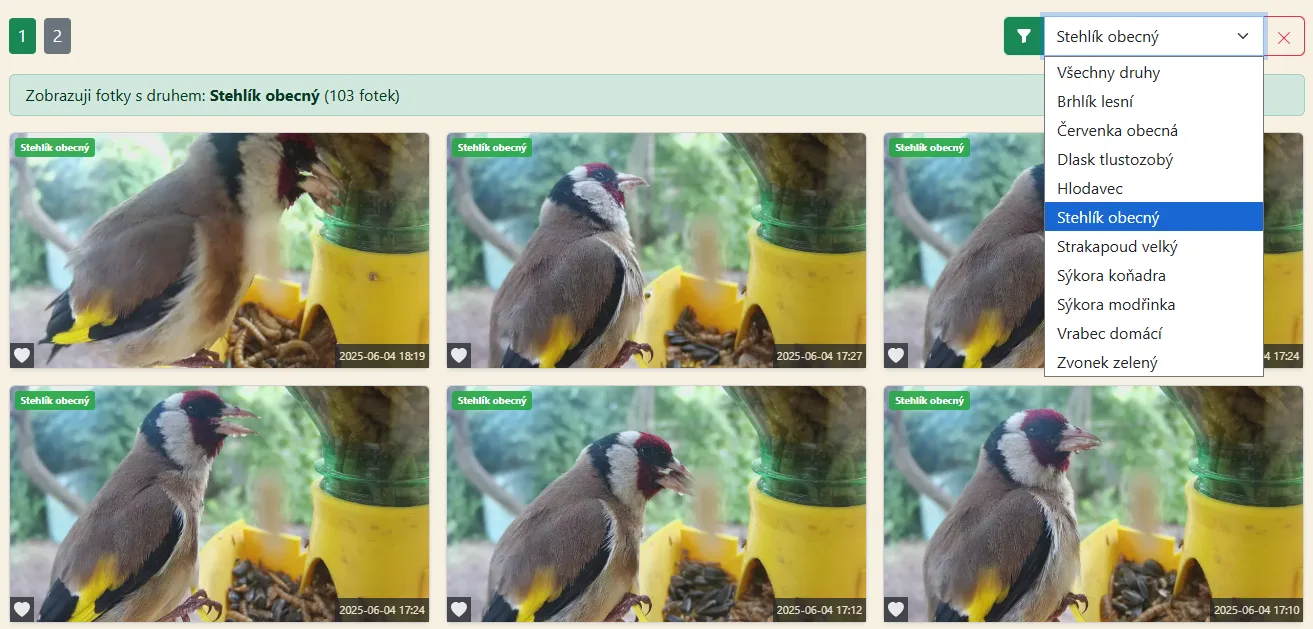
- Add the option to filter photographs by bird species.
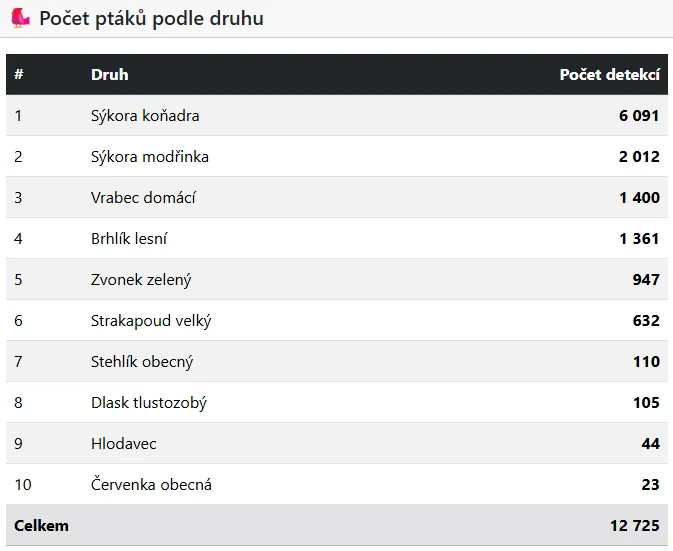
- Add a statistics page, so I can admire how many times each bird stopped by for seeds.
On the PC side, on the other hand, it was necessary to create a script that pulls a list of photos to be processed from the API, runs them through the model, and returns the result to the server.
AI again nailed it on the first try and even added parameters to the script including a “loop”, so it just needs to be started and it periodically checks if new photos need to be processed.

This way, I let all 13+ thousand photos on the server run through, which took about an hour (with one thread and using the small model), and I admired the results. They were very good, and the incorrect detections were estimated to be below 3%. The labels on the photos greatly pleased me at that moment:
Re-training AI
I manually went through the photos by bird categories, and where a different bird was visible, I downloaded the photo for further training. In the end, I pulled out those photos from the database where the model’s confidence level was below 75%. I ended up with over 500 additional photos, which I uploaded to Label Studio and labeled them all again.
These were mainly photos where the bird was captured from a different angle and distance, in an unusual position, in different lighting conditions, and perhaps even with an altogether different composition of the photograph. I also added more photos where no bird was present.
The resulting trained model was again run over the entire database of photos for classification, and the result was excellent; the vast majority of errors were gone, and OnlyBirds will now benefit from AI detection.
Thanks to AI guidance and the fact that instead of tasks taking several hours, I could continue in a few minutes, it was not a problem to complete this functionality and push the project forward a bit again.
Having your own model and detection is definitely worth it – once you have a solid sample of data, its success rate will be high, and if you are doing something more specific, then it is the right path.
The article was written by Michal Ševčík, author of the projects TMEP.cz, ŽivýObraz.eu, and OnlyBirds.cz.
Thank you for the article.