Microcontrollers CH32V – you’ve probably heard of them. They are sold at a ridiculously low price, but they come with a very decent set of features and are available in a well-solderable package. Among the peripherals, you will find not only classic GPIO but also SPI, ADC, UART, I2C, timers, and counters, with higher versions offering USB as well. Here’s a guide on how to get started with these microcontrollers – in my case, on Linux.
I tested this guide on the Ubuntu operating system. I will attempt (without real testing) to suggest modifications to make it work on Windows as well.
Required HW
To test what CH32V can do, we need to buy a development kit – you can of course solder the development board yourself at home, but that’s not what this guide is about.
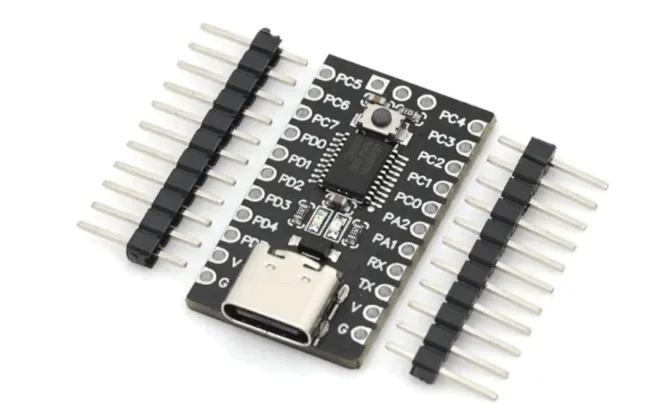
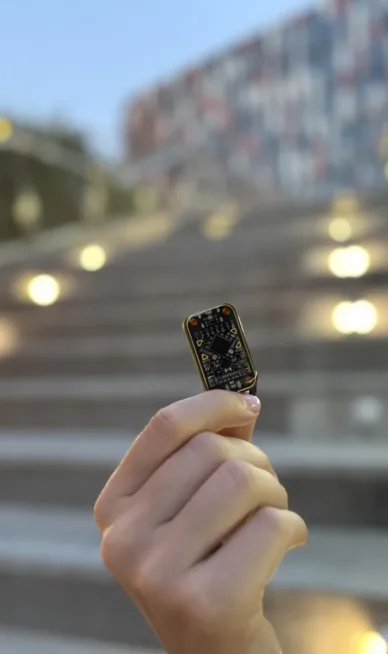
I bought the CH32V003 development board with 48 MHz for 54 CZK from laskakit.cz
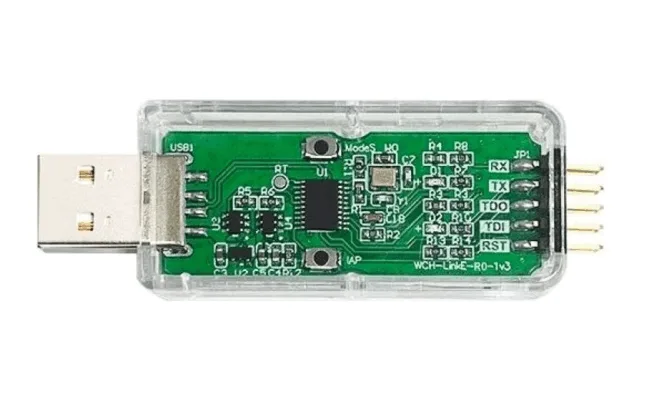
Next, we need a programmer – I bought the WCH-LinkE for 158 CZK from laskakit.cz
You might be wondering, “Can’t it be programmed via USB?” No, this chip does not have a USB bootloader and requires a programmer for programming.
If you don’t want to buy a programmer, you can “create” one from STM32F042, ESP32S2, or from Arduino Uno R3.
Programmer
So we should have the programmer purchased. The default setting of the programmer is for ARM programming; we need to switch it to RISC-V mode.
- First, open the plastic case.
- Press the ModeS button.
- While holding the button, plug the programmer into the USB port of the computer.
- Then you can release the button. The blue LED on the programmer MUST NOT be lit, but the RED one must! A blue LED indicates programming in ARM mode.
- When you unplug and plug the programmer back into USB, there is no need to press the ModeS button again; the programmer remembers the last setting.
Connecting the Programmer to the CH32V003 Development Board
Connection WCH-LinkE and CH32V00x
GND – GND
3V3 – V
SWDIO – SWD
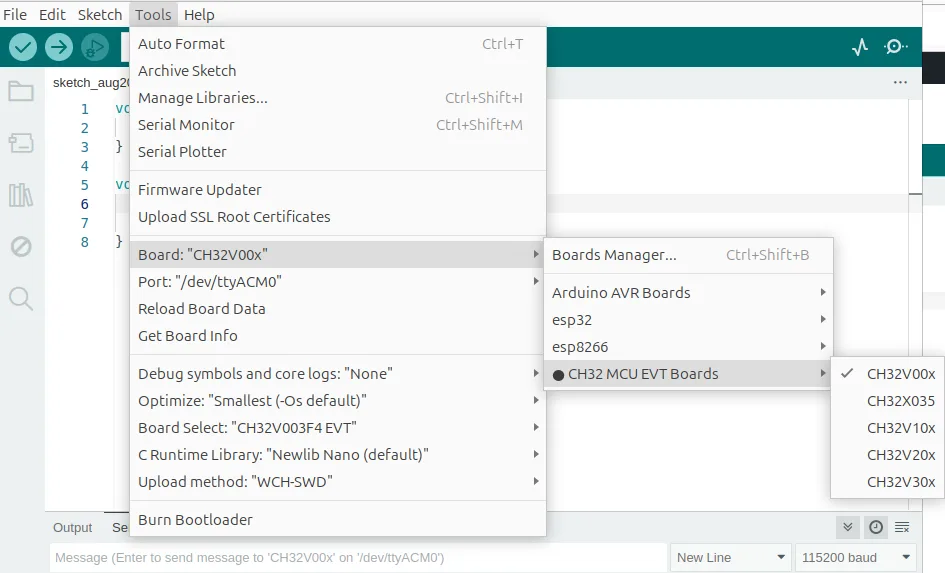
Adding JSON for CH32V Support in Arduino IDE
In File – Preferences, add this JSON to Additional Board Managers URLs. This will allow you to install support for CH32V003 (and other CH32V microcontrollers).
https://github.com/openwch/board_manager_files/raw/main/package_ch32v_index.json
Arduino Core for CH32V https://github.com/openwch/arduino_core_ch32

Problem Uploading in Arduino IDE
During uploading, you will see an error message stating that the program could not be uploaded. We need to install openOCD.
For Windows, it is probably sufficient to install openOCD https://openocd.org/pages/getting-openocd.html
Installing openOCD
Open a terminal and install openOCD
sudo apt-get update
sudo apt-get install openocd
Do you see this error?
Error: libusb_open() failed with LIBUSB_ERROR_ACCESS
Error: open failed
Failed uploading: uploading error: exit status 1
Then we need to add a new udev rule for WCH-LinkE
sudo nano /etc/udev/rules.d/50-wch-link.rulesinsert
SUBSYSTEM=="usb", ATTR{idVendor}=="1a86", ATTR{idProduct}=="8010", MODE="0666"
SUBSYSTEM=="usb", ATTR{idVendor}=="1a86", ATTR{idProduct}=="8020", MODE="0666"
save
Now reload the udev rules for USB devices
sudo udevadm control --reload-rules
sudo udevadm trigger
Unplug and reinsert the WCH-LinkE programmer (there’s no need to hold the ModeS button if the blue LED is not lit)
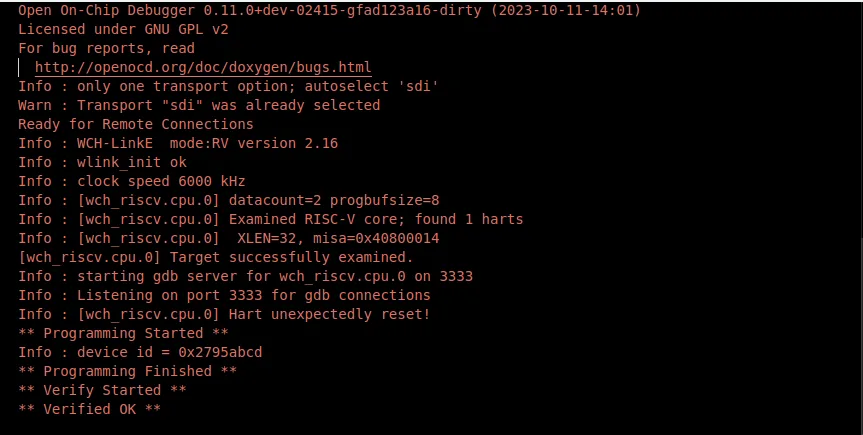
And let’s try to upload again – done, it works.
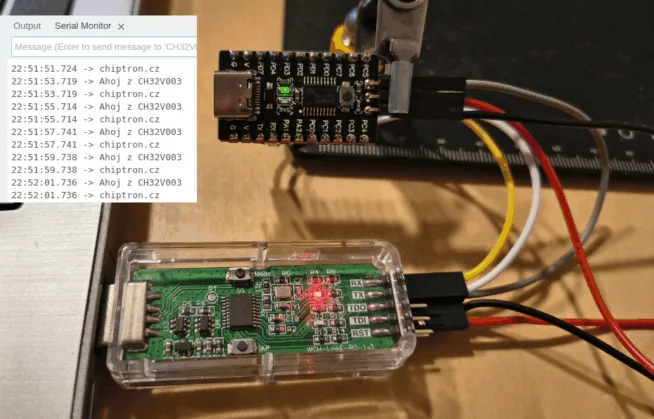
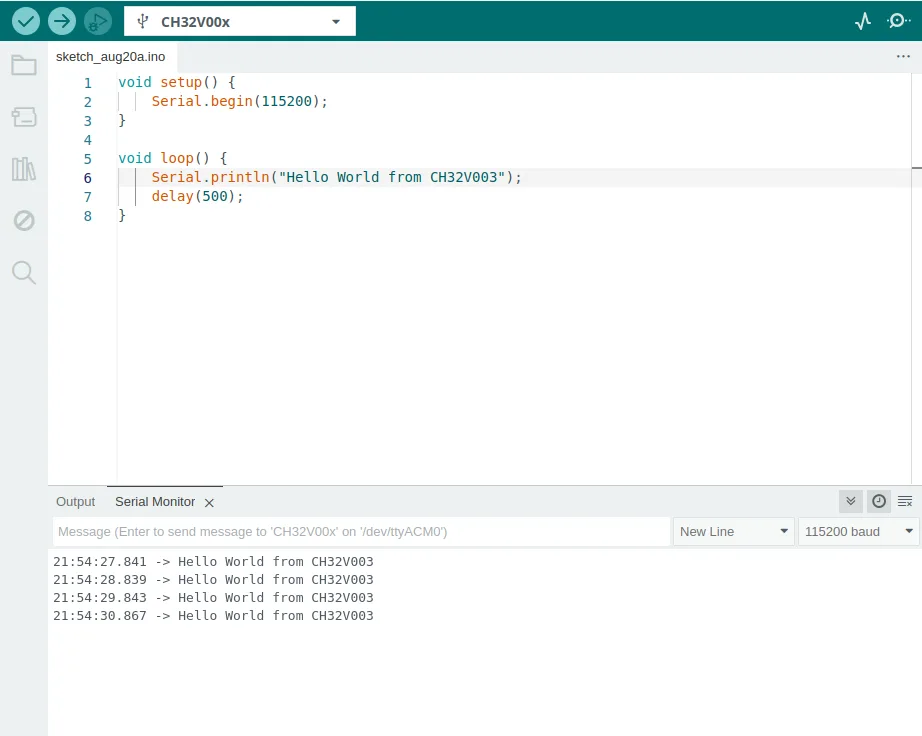
Connect RX on the development board to TX on the programmer and vice versa. In the Serial Monitor, you will see the message you sent there.
Pinout of the CH32V003 Chip
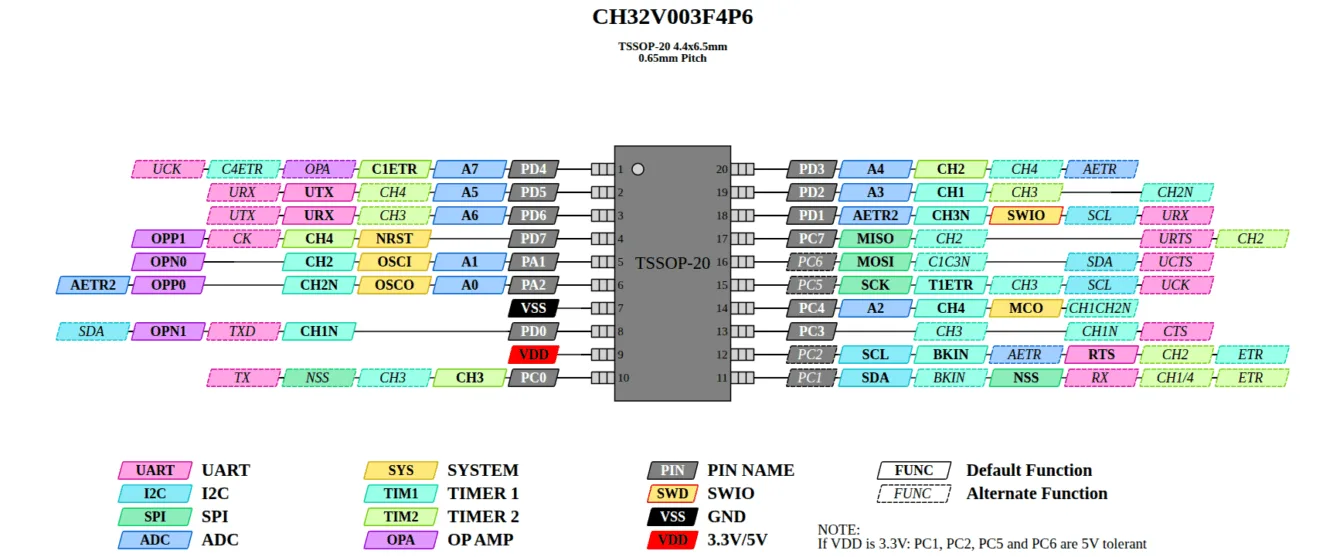
source: https://raw.githubusercontent.com/Tengo10/pinout-overview/main/pinouts/CH32v003/ch32v003f4p6.svg
Development Kit and Missing Documentation
All GPIOs are labeled on the CH32V003 development board, and the connected peripherals are described in the diagram above. The board doesn’t have much more, so extensive documentation is probably unnecessary. Except for the description of the button – that is missing.
The development kit has a button, but there is no mention of where it is connected. Here is my sample code.
The Button is Connected to PD2 – Let’s Test It
const int buttonPin = 2;     // PD2 according to mapping in Arduino IDE
const char* buttonName = "PD2";

int lastState = HIGH;        // assuming pull-up, button active LOW
int pressCount = 0;

void setup() {
  Serial.begin(115200);
  delay(1000);

  pinMode(buttonPin, INPUT_PULLUP); // input with internal pull-up
  lastState = digitalRead(buttonPin);
}

void loop() {
  int currentState = digitalRead(buttonPin);

  if (currentState != lastState) {
    // Small delay (debounce)
    delay(50);
    currentState = digitalRead(buttonPin);
    if (currentState != lastState) {
      lastState = currentState;

      // Detect only the transition to pressed state (LOW)
      if (currentState == LOW) {
        pressCount++;
        Serial.print("Button on pin ");
        Serial.print(buttonName);
        Serial.print(" was pressed. Total: ");
        Serial.println(pressCount);
      }
    }
  }
}
CH32V003 in Arduino IDE
You won’t find many sample examples for CH32V003 in Arduino IDE. However, there is an alternative route – avoid Arduino IDE and write so-called low-level code. This code is not directly compatible with Arduino IDE – it uses different functions, sometimes even direct access to registers (see below).
Github sample examples for Arduino IDE by Alexander https://github.com/AlexanderMandera/arduino-wch32v003/tree/master/examples
Github https://github.com/openwch/arduino_core_ch32
JSON file for Board Manager https://github.com/openwch/board_manager_files/blob/main/package_ch32v_index.json
Another Path – CH32fun!
Question: It is probably necessary to have openOCD installed for using CH32fun as well – see the beginning of the article.
For this programming, the WCH-LinkE must also be switched to RISC-V programming, meaning the blue LED on the programmer must not be lit after connection.
If it is lit, unplug the programmer, press the ModeS button on the programmer, and plug it back into the computer.
Installing Required Files
apt-get install build-essential libnewlib-dev gcc-riscv64-unknown-elf libusb-1.0-0-dev libudev-dev gdb-multiarchDownload the package from GitHub – dozens and dozens of sample codes
https://github.com/cnlohr/ch32fun
Navigate to the folder of the sample code you want to try and open a terminal.
In the open terminal, just type
makeAnd the program will compile and upload to CH32V003.
Other Programming Options
CH32Vxyz can also be programmed in the Rust programming language.
https://github.com/ch32-rs/ch32-hal/tree/main
Conclusion
The CH32V microcontrollers can be an interesting alternative to well-known and widely used microcontrollers like RP2040, ESP32, STM32, and others.
The CH32V family includes both simple microcontrollers with basic peripherals and very powerful microcontrollers with USB peripherals, for example.
Support for CH32V microcontrollers in Arduino IDE and the availability of sample codes is not very extensive – for example, compared to STM32duino, which supports dozens of chips from the STM32 family, development boards with STM32, and also contains many sample examples.
However, the CH32fun project is an interesting alternative to Arduino IDE, offering many more sample codes that can help better understand the functionality of the chip. Unfortunately, the codes are not compatible with Arduino IDE.
Sources:
https://www.hackster.io/patrick-fitzgerald2/program-ch32v003-risc-v-with-arduino-ide-135f6f
https://pallavaggarwal.in/2023/09/20/ch32v003-programming-guide/

