Arduino is very popular platform with support from huge community.
You can buy a lot of Arduino (compatible) boards – original Arduino, clone of Arduino with the same microcontroller (ATmega328, SAMD21) or different microcontroller (ESP32, ESP8266).
Arduino board with STM32 microcontroller belongs to the Arduino compatible boards with different microcontrollers.
LeafLabs and also community around Arduino made STM32 library for Wiring, programming language which uses Arduino IDE.
The made version of library supported only STM32F103 – it?s common microcontroller which has much SRAM, FLASH, GPIOs and high speed clock instead of ATmega328.
This microcontroller, STM32F103, is used on few boards – Minimum System development boards (called like BluePill and BlackPill (newer)) or development board by LeafLabs called Maple Mini. List of cheap (5 USD) development boards is here
All articles about STM32duino:
STM32duino I. – How to start with STM32 like Arduino
STM32duino II. – control GPIO
STM32duino III. – How to use Serial (USART)
STM32duino IV. – Read temperature and humidity from Si7021 (I2C bus)
STMicroelectronics recognized an increased interest and began to develop own STM32 Arduino library for own development boards called STM32duino. The STM32duino github is available on this link.
At this moment, the STM32duino supports more than twenty types of microcontrollers from STM32 family.
Each type of microcontroller is focused on different field – low power consumption, high performance, much interfaces, acurate timers, acurate ADC/DAC, SRAM, FLASH size and other.
The list of supported STM32 microcontrollers is available on official ST github called STM32duino
https://github.com/stm32duino/Arduino_Core_STM32#boards-available
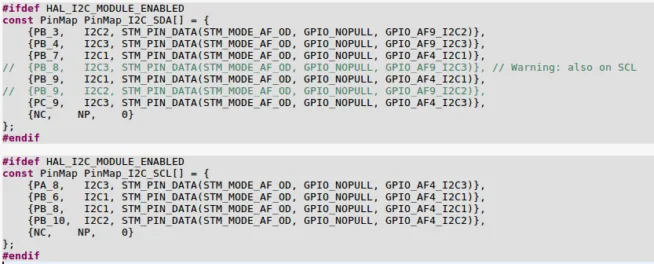
The STM32 can contain much peripherals – GPIO, UART, SPI, I2C, Timer, ADC, DAC, USB HID which are now supported. STMicroelectronics will updated support of CAN, USB CDC and other.
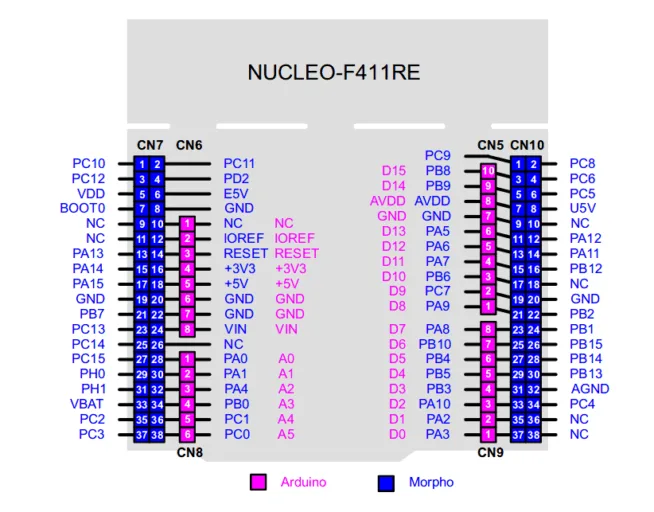
For these tutorials about STM32duino I will use Nucleo 64 development board with STM32F411 microcontroller.
You can buy it on TME, Farnell
Installation of STM32 package to Arduino IDE
The installation of STM32 package is very easy.
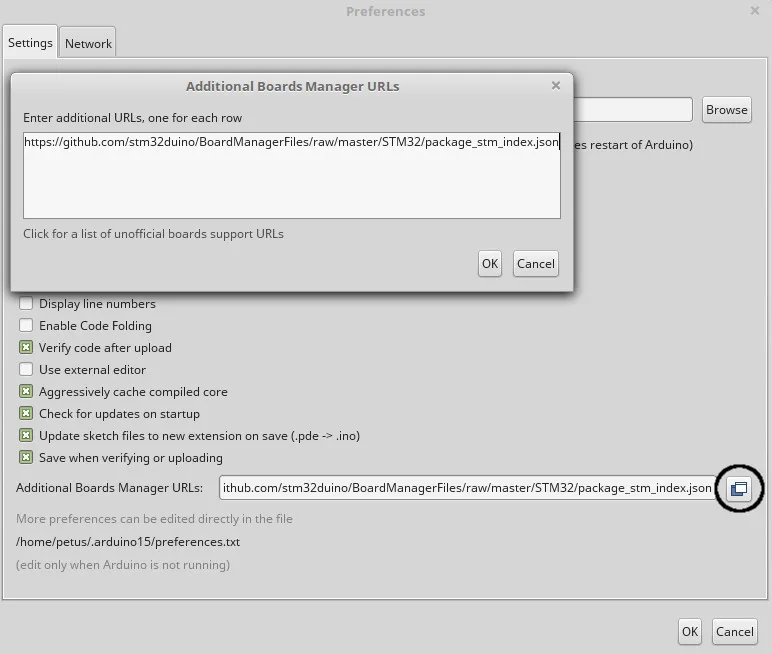
Click to File -> Preferences -> and click to highlighted icon (on the picture below).
Write this link to Additional Boards Manager URLs windows
https://github.com/stm32duino/BoardManagerFiles/raw/master/STM32/package_stm_index.json
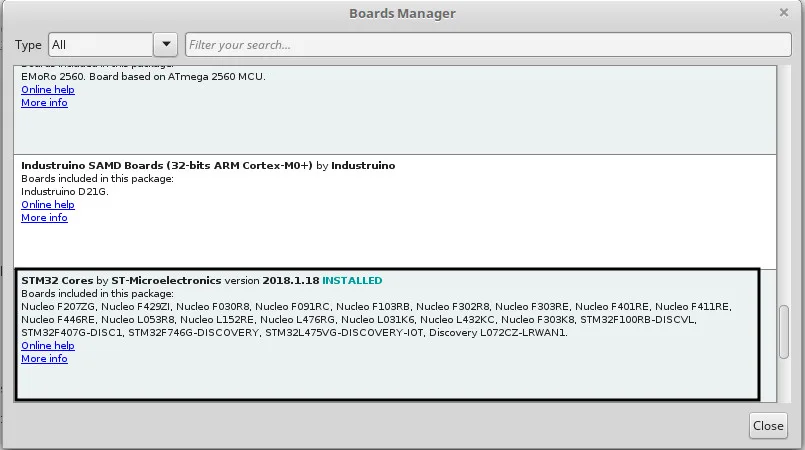
You will see this package in Tools bookmark -> Board -> Boards Manager
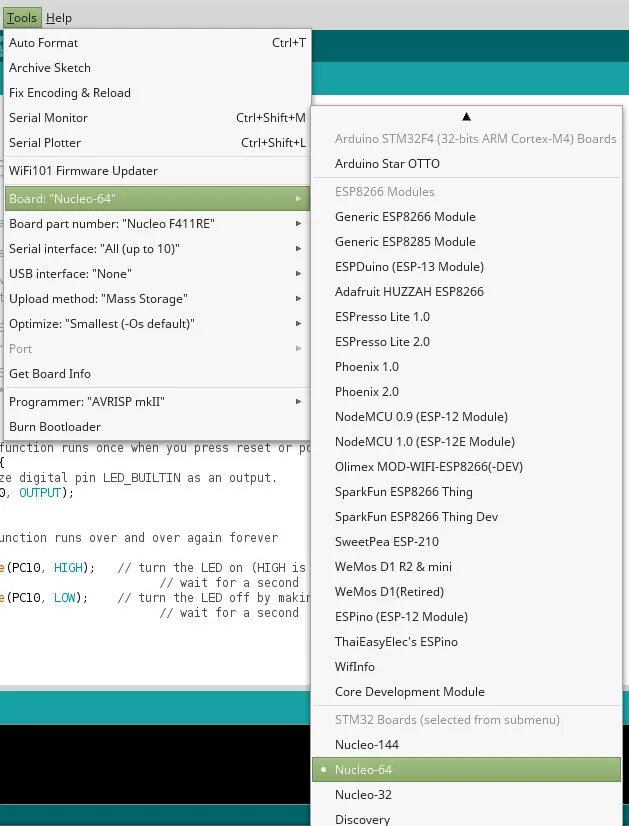
After the installation, you will see more options in Tools bookmark.
Choose Nucleo-64 (if you have different development board, write your – Nucleo-32, Nucleo-144, Discovery ) in Board.
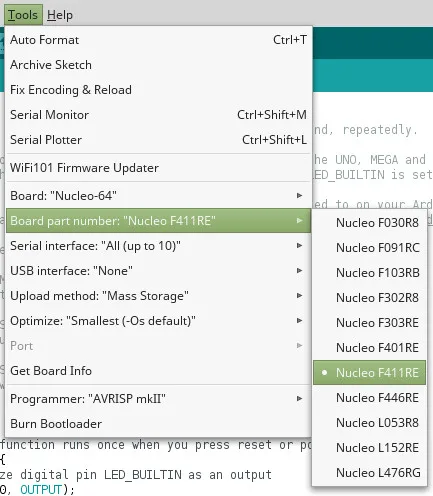
Choose the right microcontroller in Board part number
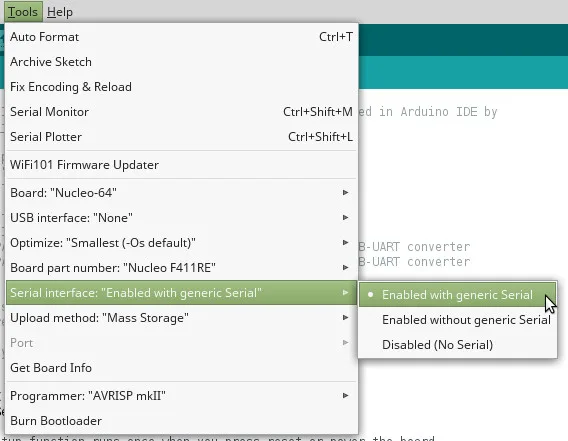
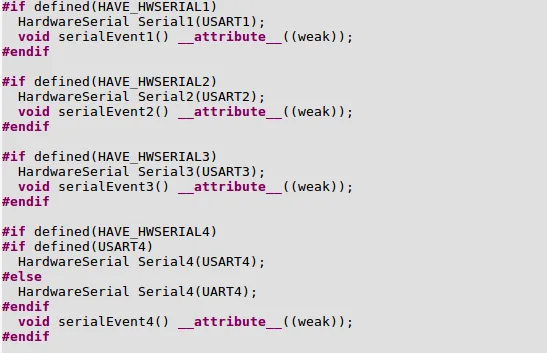
STM32 microcontrollers contains more hardware UARTs, you can choose what Serial interface you will use.
The detailed description of UART will be in the next article.
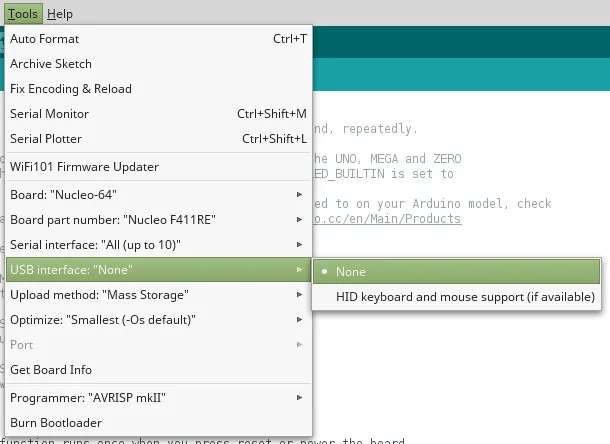
Some STM32 microcontrollers contain hardware USB interface and here you can choose if you want to use it and how. At this moment, STM32duino doesn’t support all USB classes. Now is supported USB HID.
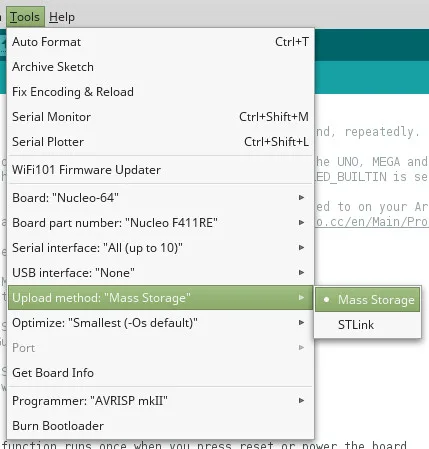
Nucleo nad Discovery development boards contains programmer/debugger ST-Link/V2-1. If you connect the dev board with this version of STLink, your Operating System alerts you that a new device is connected to your laptop. The behavior of ST-Link/V2-1 is the same like flash disk. It is connected like Mass Storage.
The second way is using ST-Link programmer, it is good way for oldest version of ST-Link or if you don?t have original Nucleo/Discovery board, but you have some supported STM32 and external ST-Link programmer/debugger.
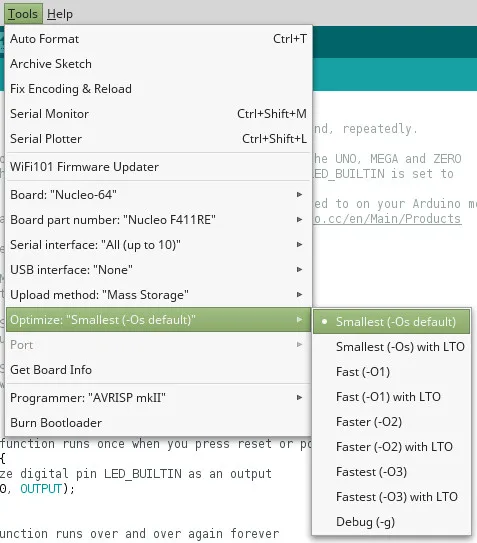
If you have the code for STM32, you can choose what optimalization of code you want.
So, when you connect the Nucleo/Discovery development board, OS shows you a new window with data which is on Mass Storage (STLink v2.1).
Now, we can try if it is working. Let?s blink with LED.
// the setup function runs once when you press reset or power the board
void setup()
{
// initialize digital pin LED_BUILTIN as an output
pinMode(LED_BUILTIN, OUTPUT);
}
// the loop function runs over and over again forever
void loop()
{
digitalWrite(LED_BUILTIN, HIGH); // turn the LED on (HIGH is the voltage level)
delay(500); // wait for a second
digitalWrite(LED_BUILTIN, LOW); // turn the LED off by making the voltage LOW
delay(500); // wait for a second
}
Is it working? Very well. In the next part, we check the UART peripheral.
Do you like this website? Share that and use #STM32duino hashtag.

