The picture tutorial how to set and run Bolt IoT platform.
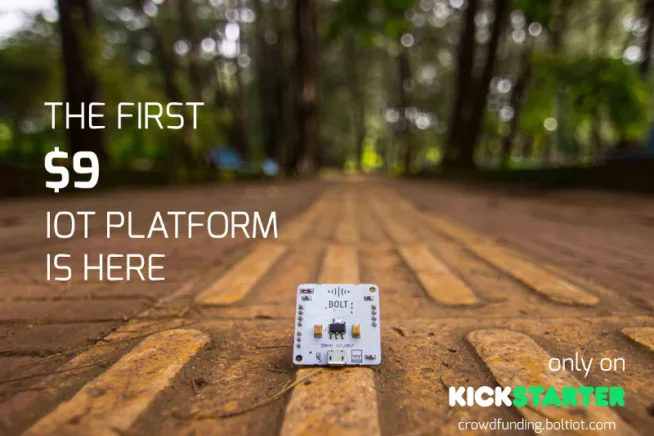
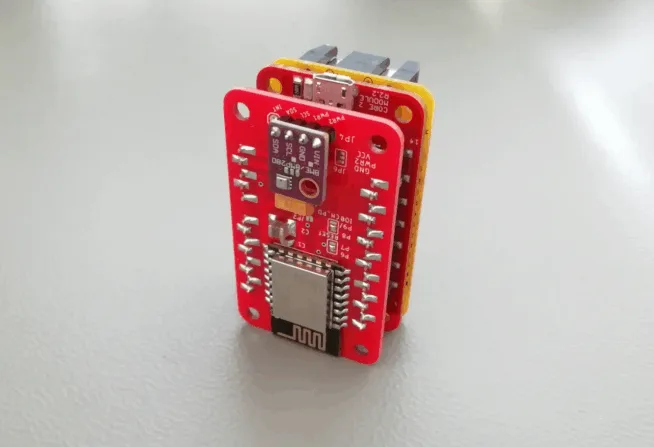
Info about Bolt IoT and kickstarter campaign was mentioned in this news. The base component is ESP8266 chip in ESP12S module. Other components are GREEN LED (cloud indication) and BLUE LED (WiFi indication, voltage regulator for 3.3V (LMS1117) and microUSB cabel which is used like power supply.
The main point of this project is SW part of Bolt IoT. Firmware of ESP8266 and cloud of the platform.
This tutorial shows how to set the Bolt IoT and Bolt IoT cloud. Next, how to turn on and turn off the LED by website from whole world.
The kickstarter campaign was founded so you can buy Bolt IoT on Indiegogo
https://www.indiegogo.com/projects/fully-integrated-iot-platform-made-for-ml#/
At first, you have to sign up on the https://cloud.boltiot.com/
After that, you confirm your e-mail address. Go to https://cloud.boltiot.com/ and you see.
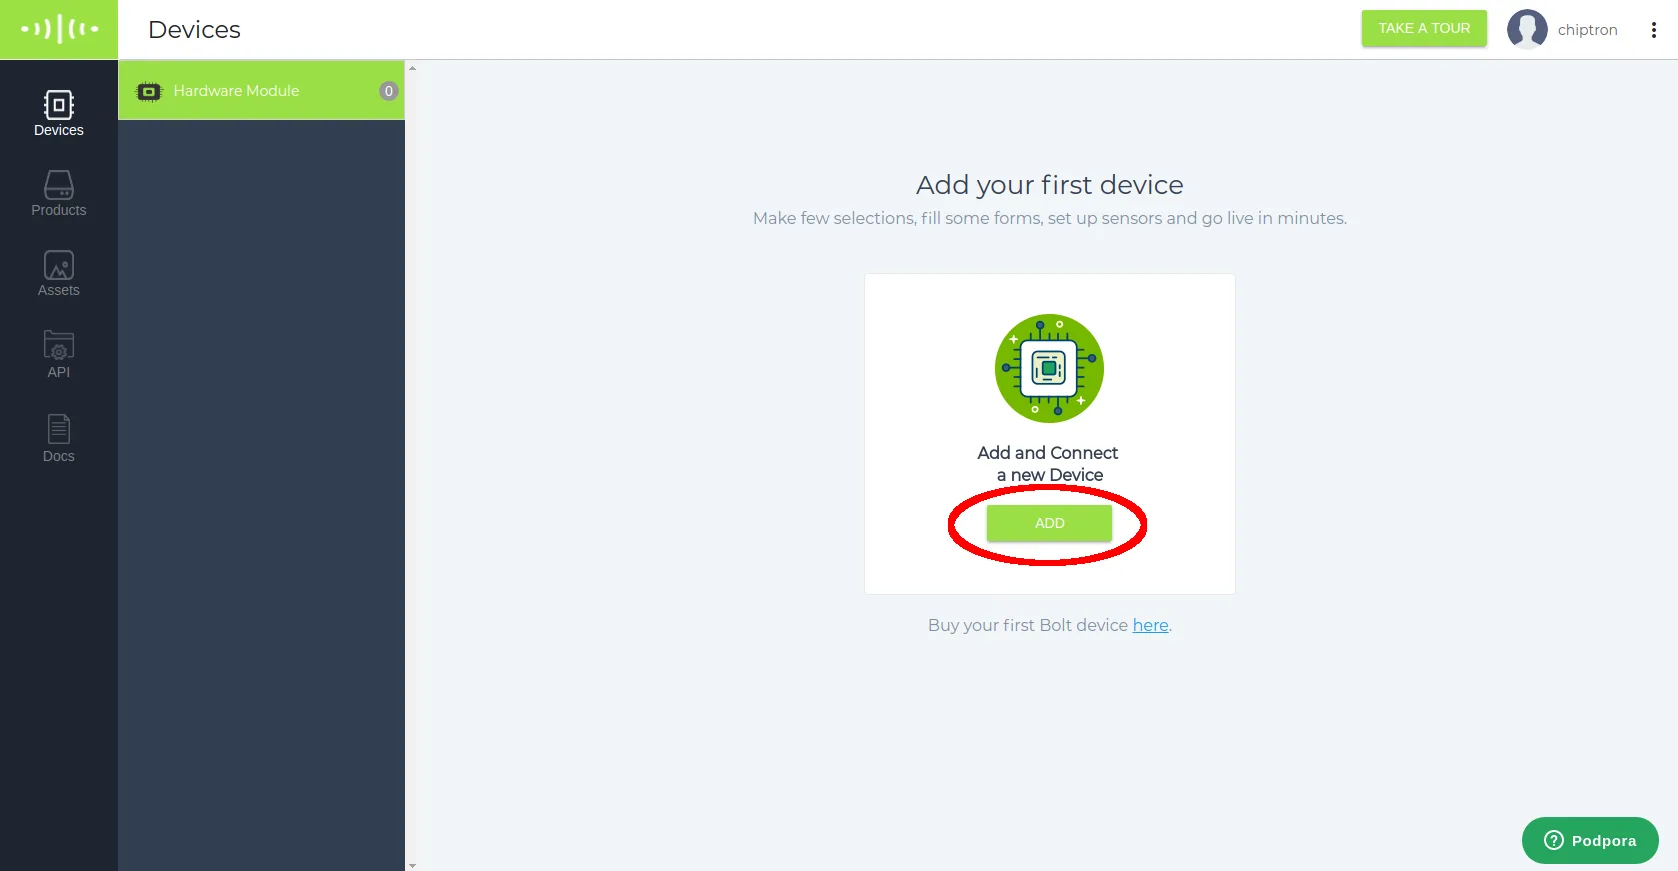
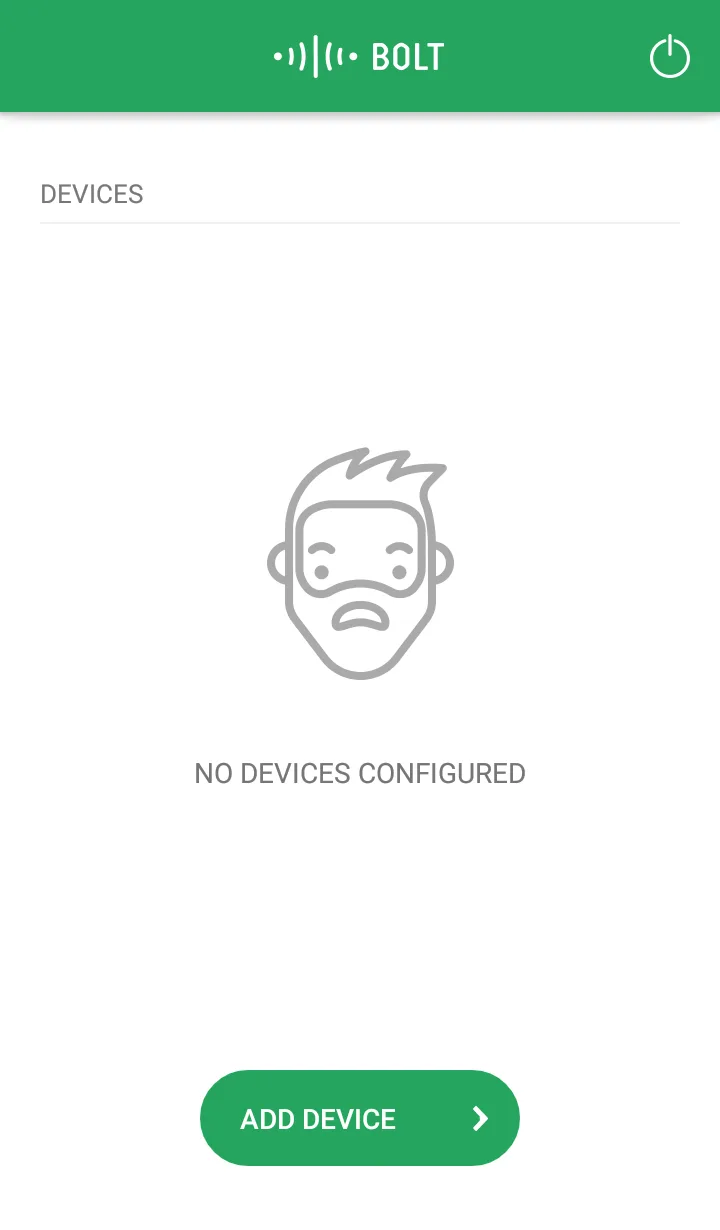
Click to ADD from “Devices”.
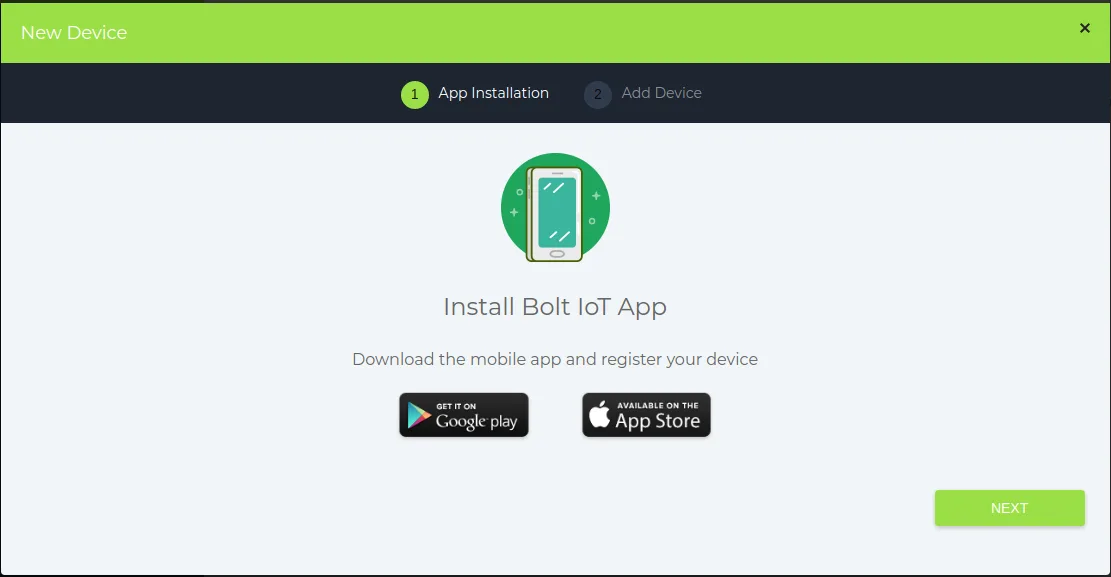
You have to install Bolt IoT App, it is used for next settings of Bolt IoT.
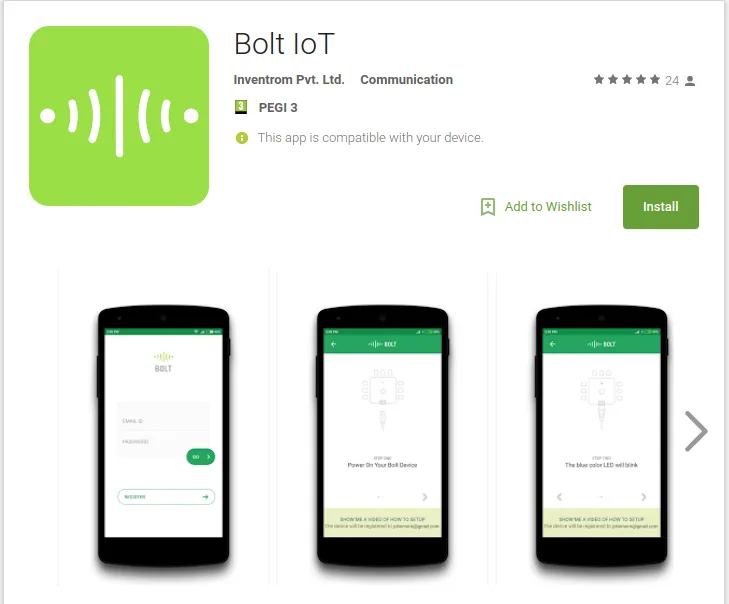
A picture from google play.
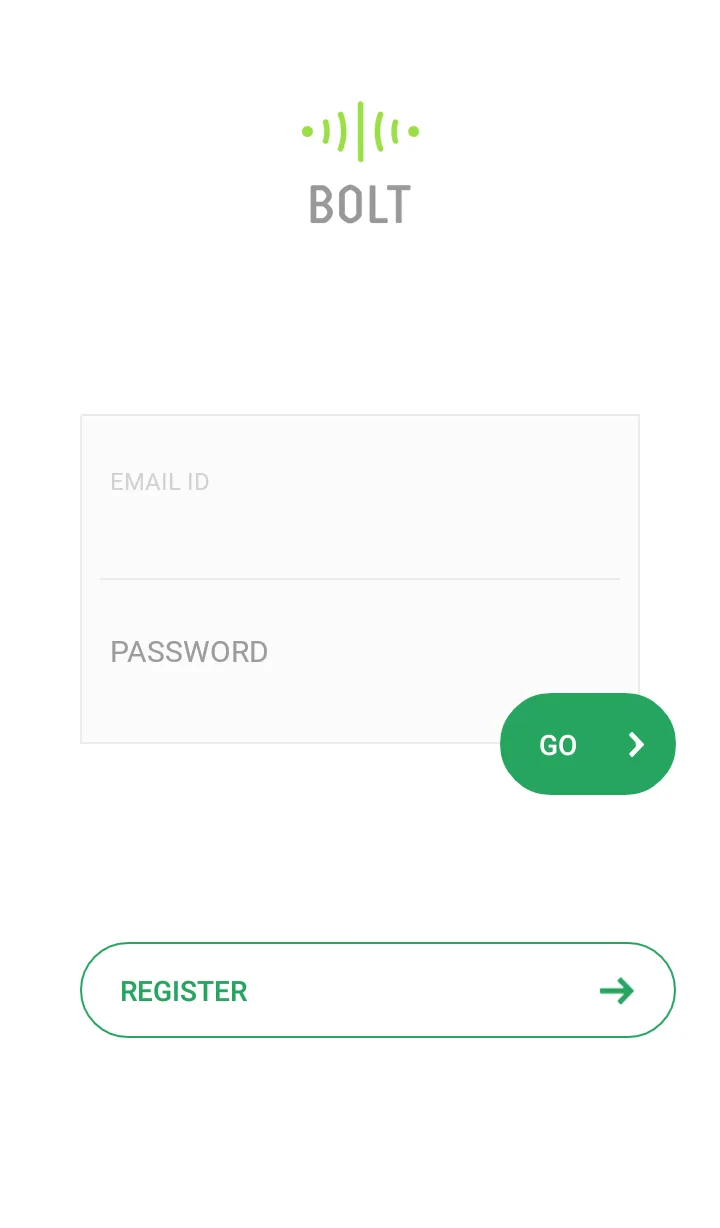
After installation, you fill up registration data and click to “Go”.
Add device by “Add device” button.
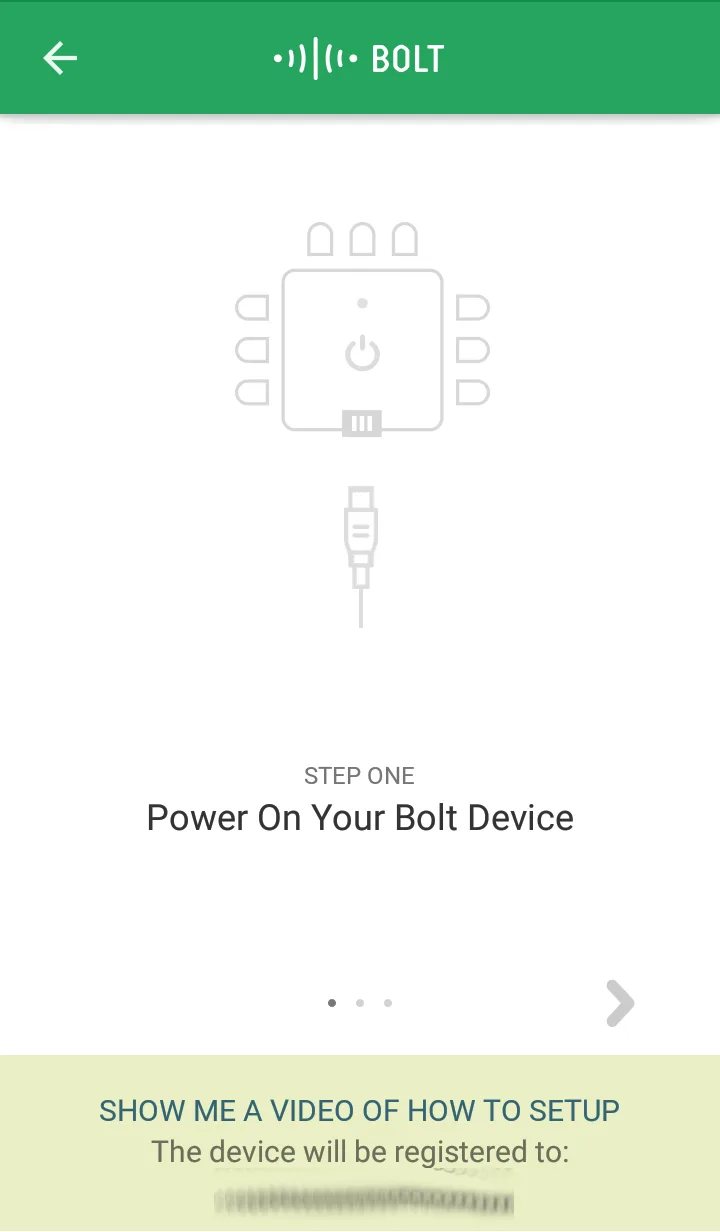
Follow next steps. Connect the power supply to Bolt IoT (microUSB cabel).
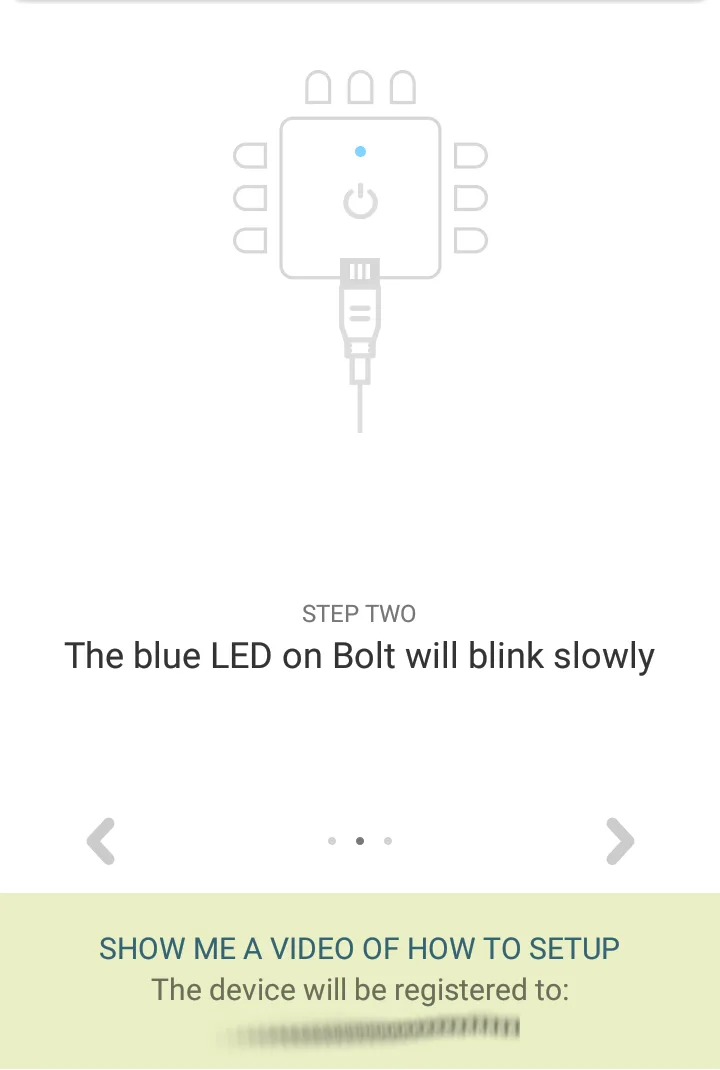
After the fisrt connection to microUSB, the board is not connected to your WiFi and also to cloud. The BLUE LED blinks very slowly – breathes.
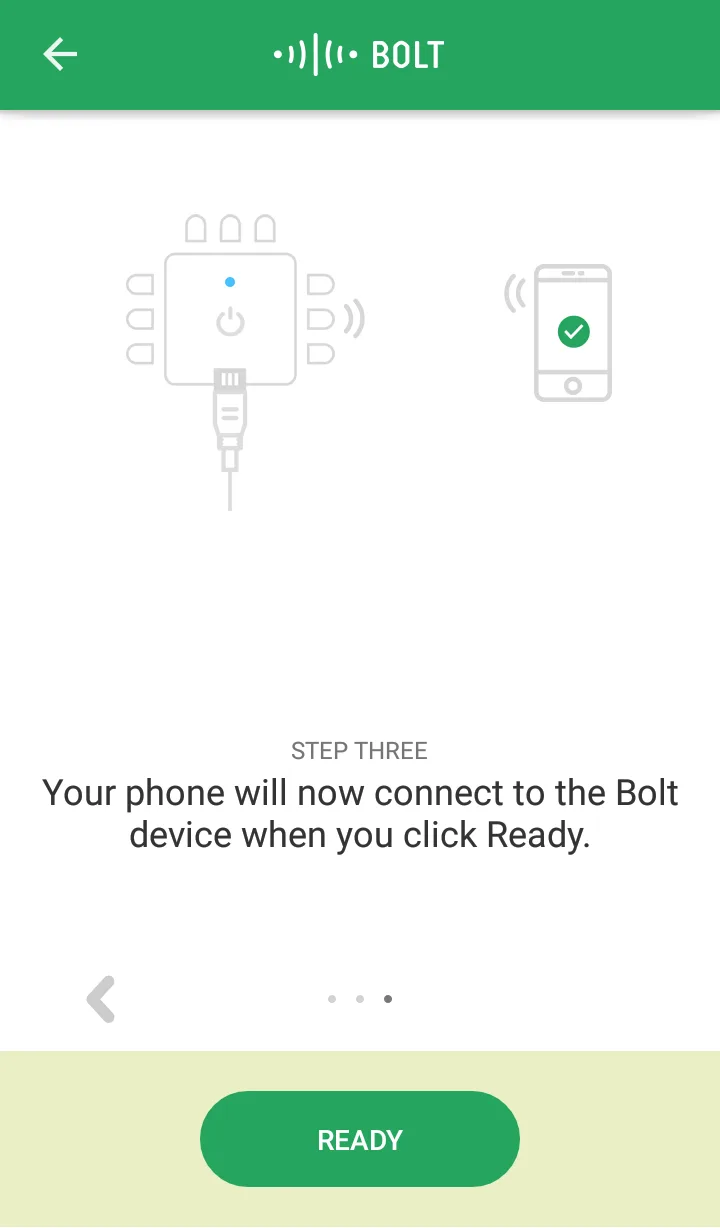
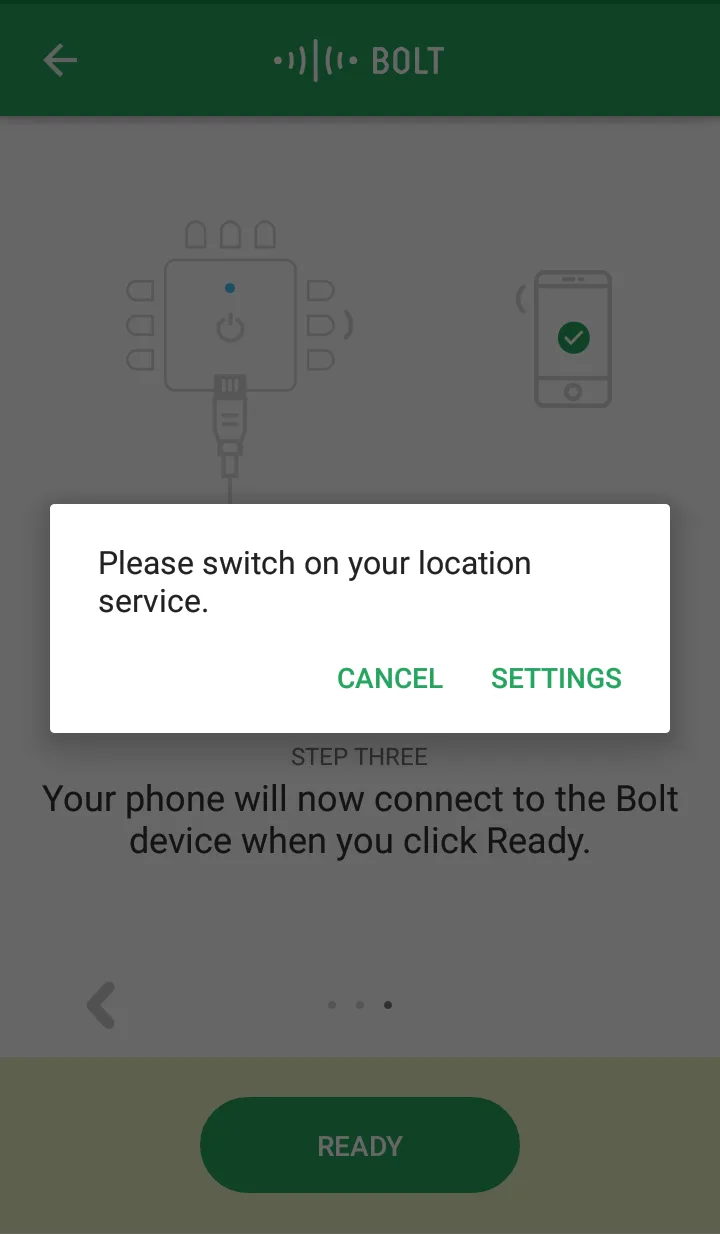
So now click to “Ready”.
App wants to switch on the location search.
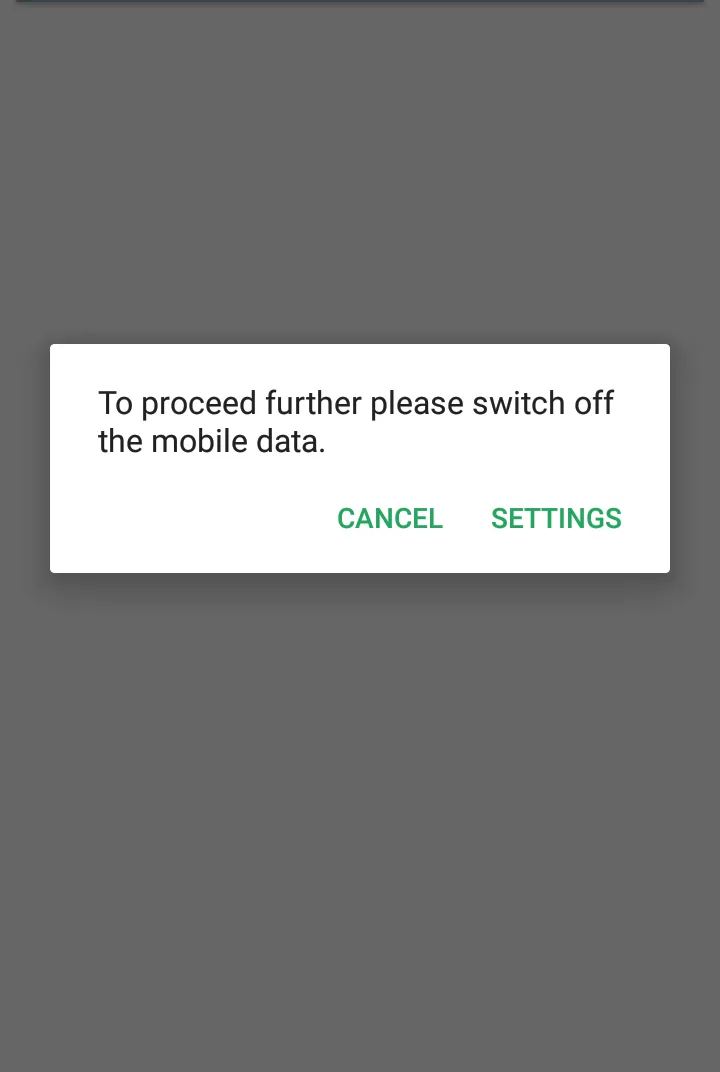
And switch off the mobile data.
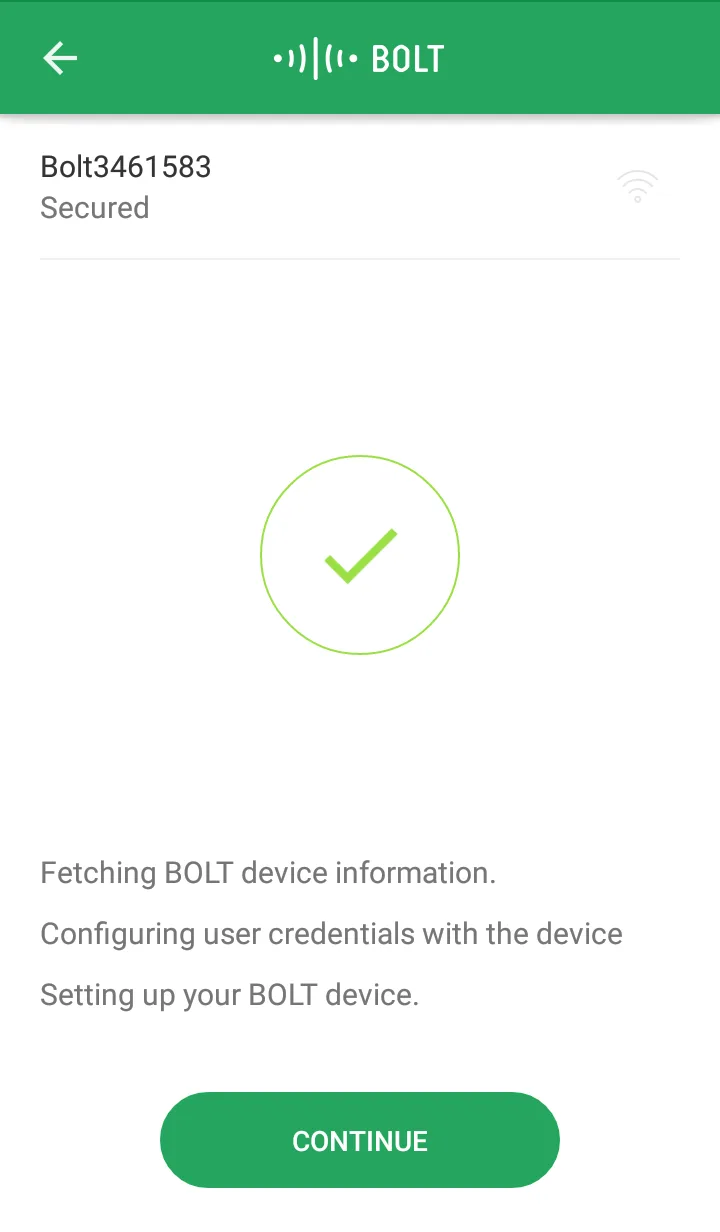
App finds your Bolt IoT board, click to “Continue”.
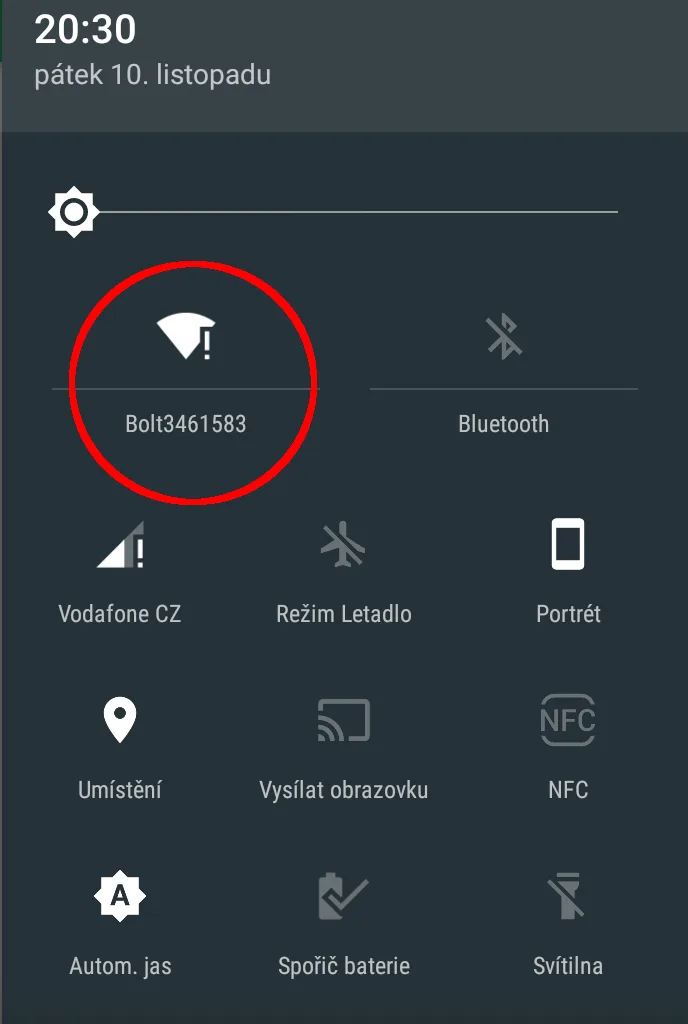
When you check the WiFi setting, you see that your phone is connected to Bolt IoT.
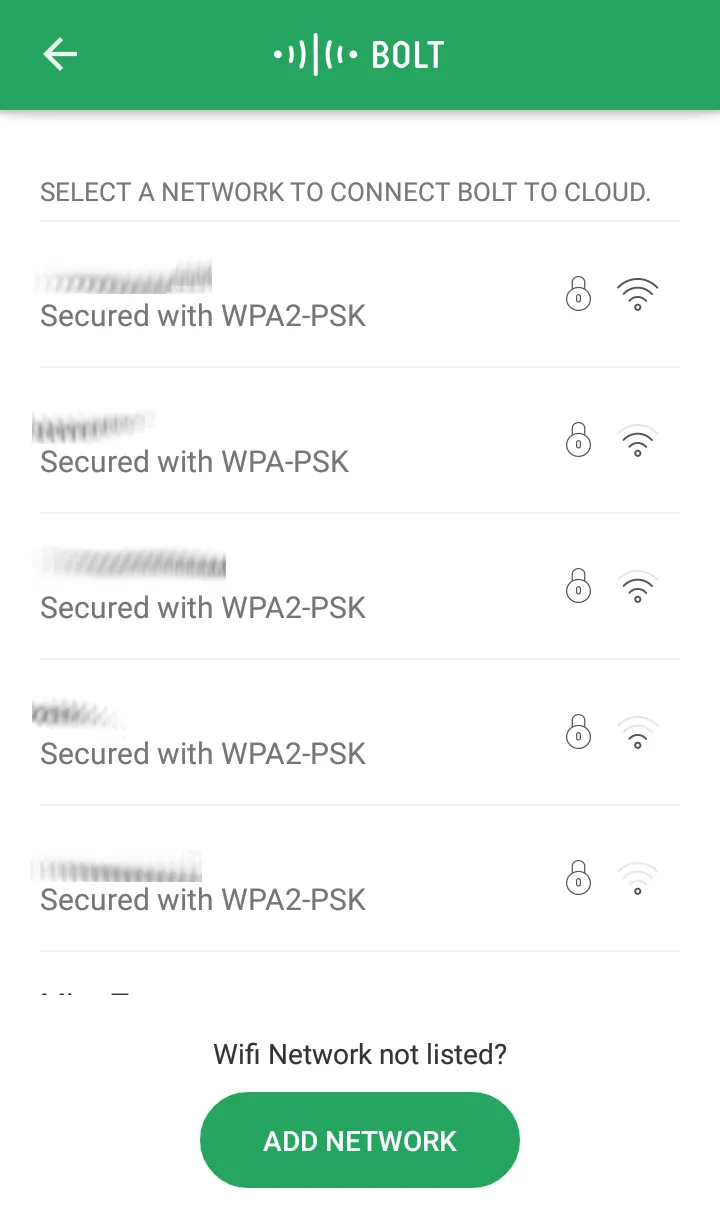
In the Bolt IoT App you choose your WiFi network.
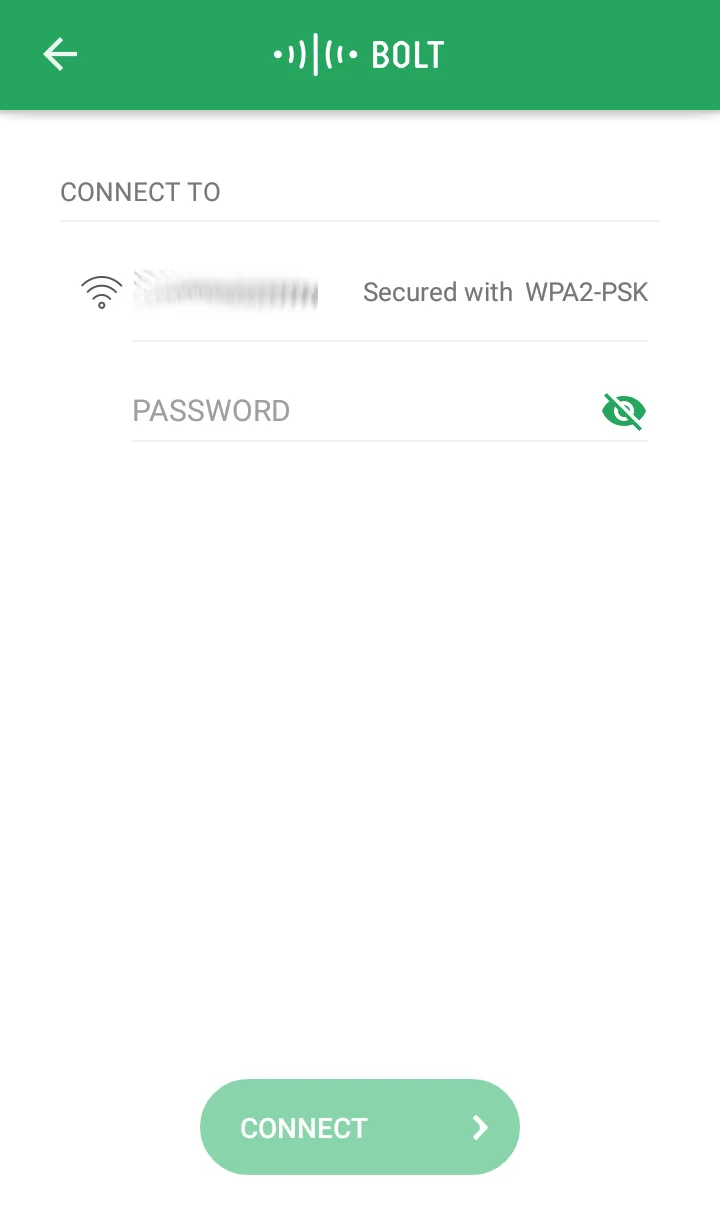
Write password of your WiFi.
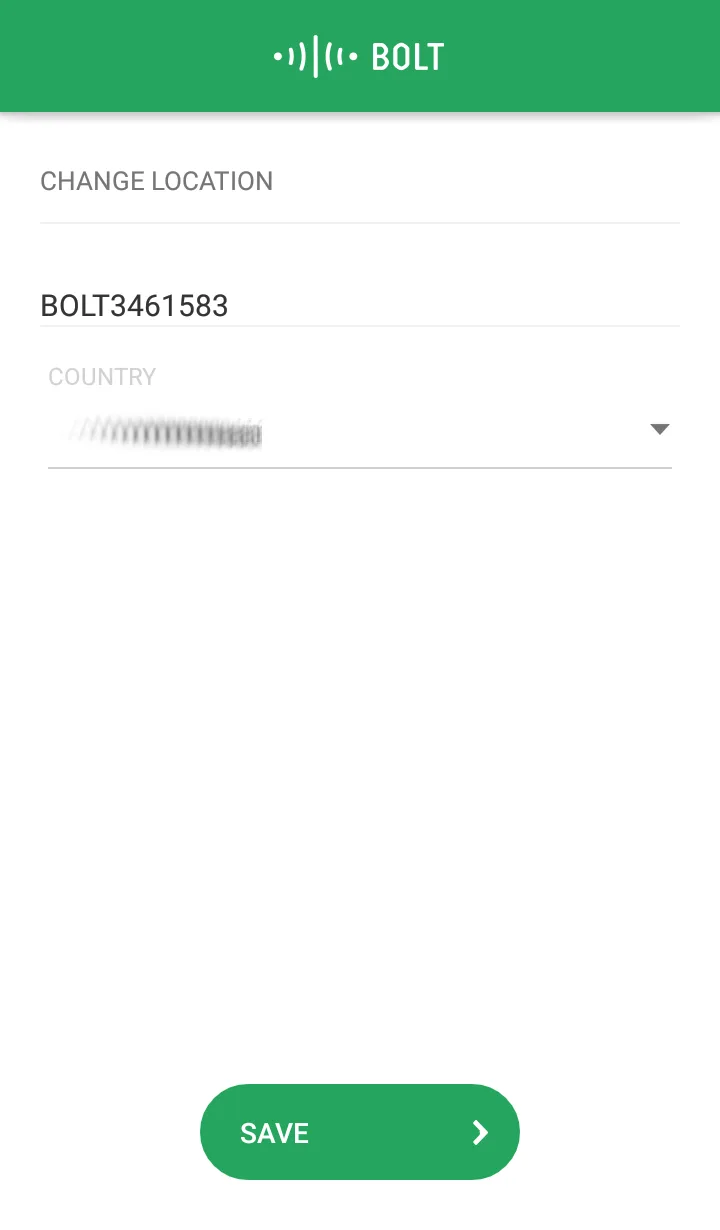
Choose the country and save that.
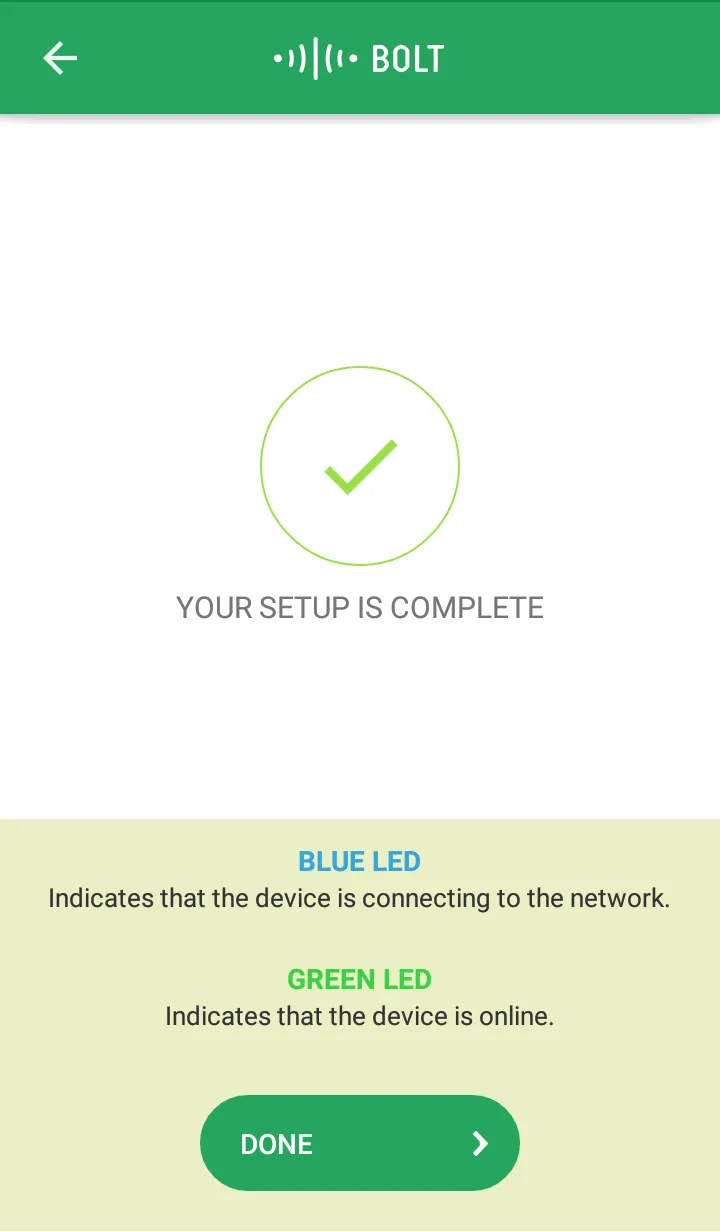
Ok, so if everything is OK, BLUE and GREEN LED shine.
GREEN LED indicate the cloud connection, BLUE LED WiFi connection.
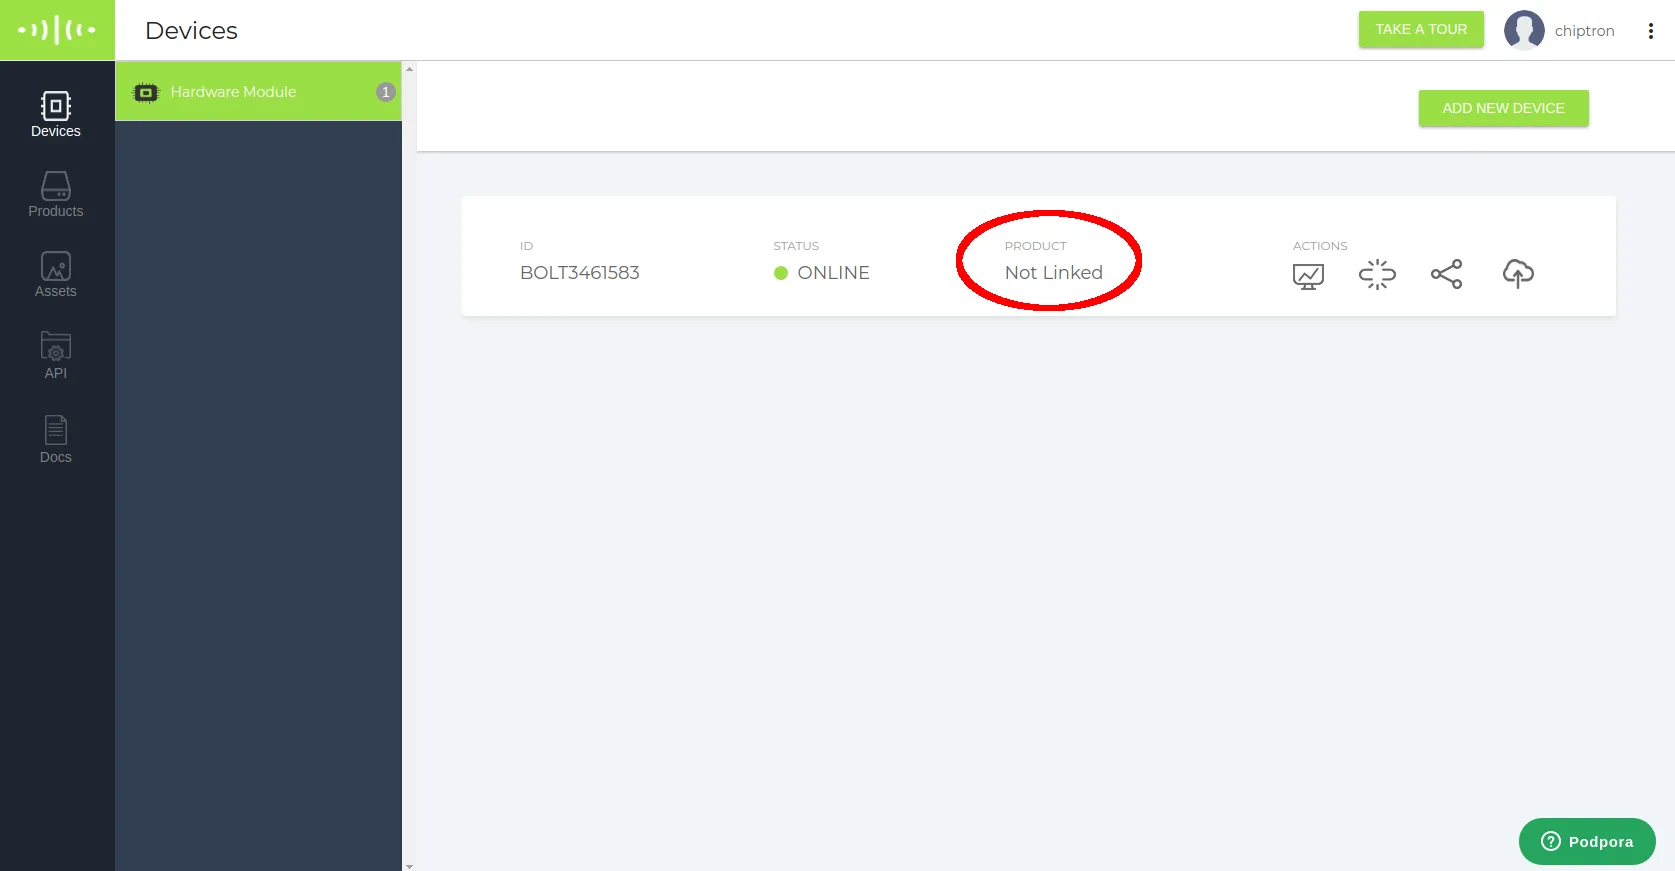
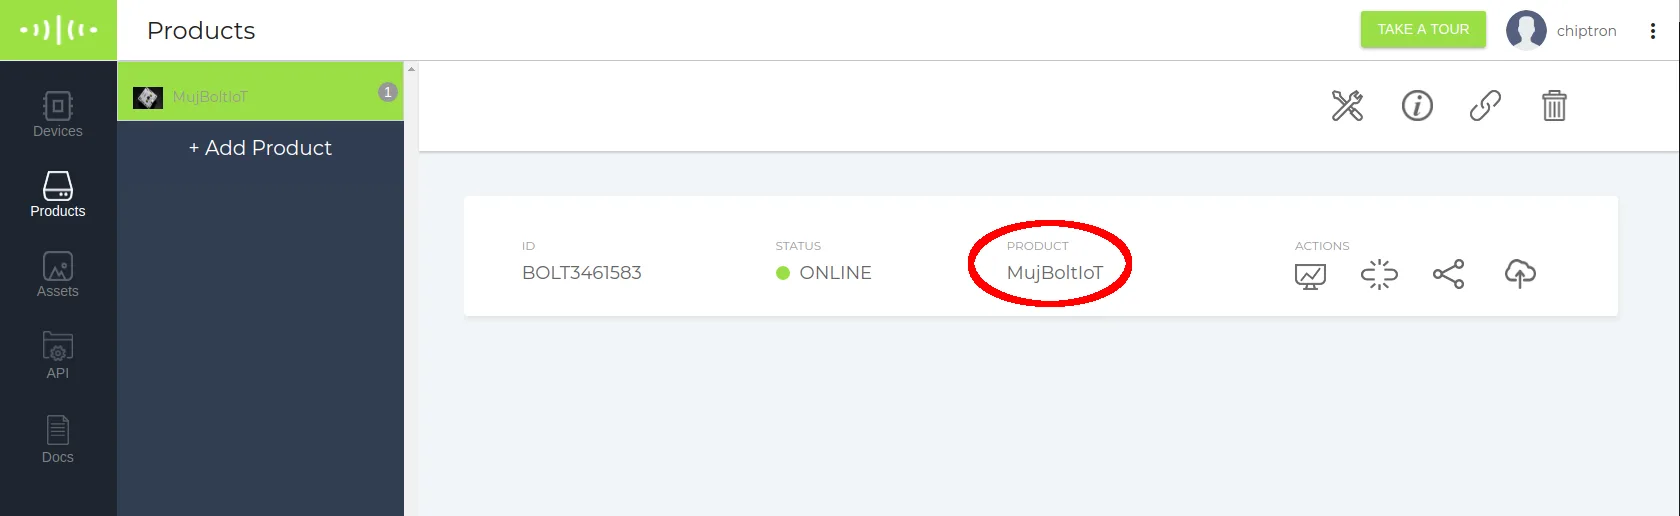
Open your web browser and go to https://cloud.boltiot.com/ find “Devices” bookmark. Now, you see your Bolt IoT board. Not Linked in “Products”. Hmm… what next?
Find IP address of Bolt IoT. You find that in settings of your router or by IP scanner.
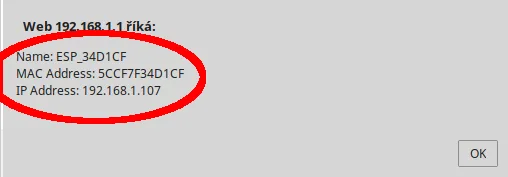
Now, you have to registrate the Bolt IoT board. Write this request to your webrowser.
Bolt_IoT_IP_address/register?email=YourEmail
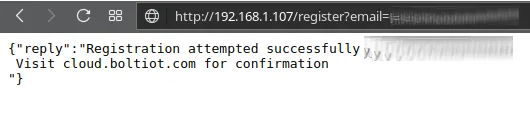
After that, you see this.
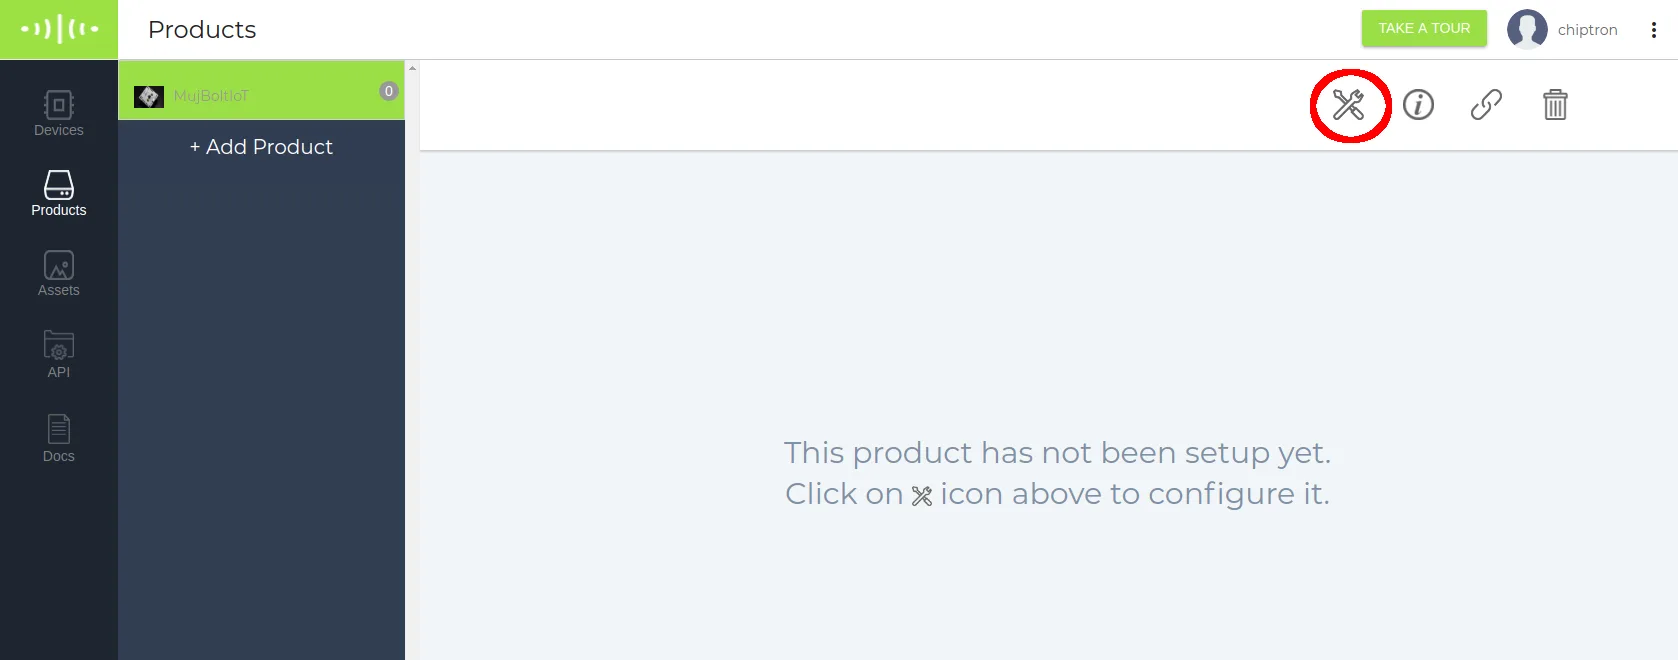
“Products” bookmark on cloud.boltiot.com you add a new product Add Product. Name the product, choose if the Bolt IoT is Input or Output device and what you will use – GPIO or UART.

Your Bolt IoT you see in “Products” bookmark. Click to highlighted icon and configure the device.
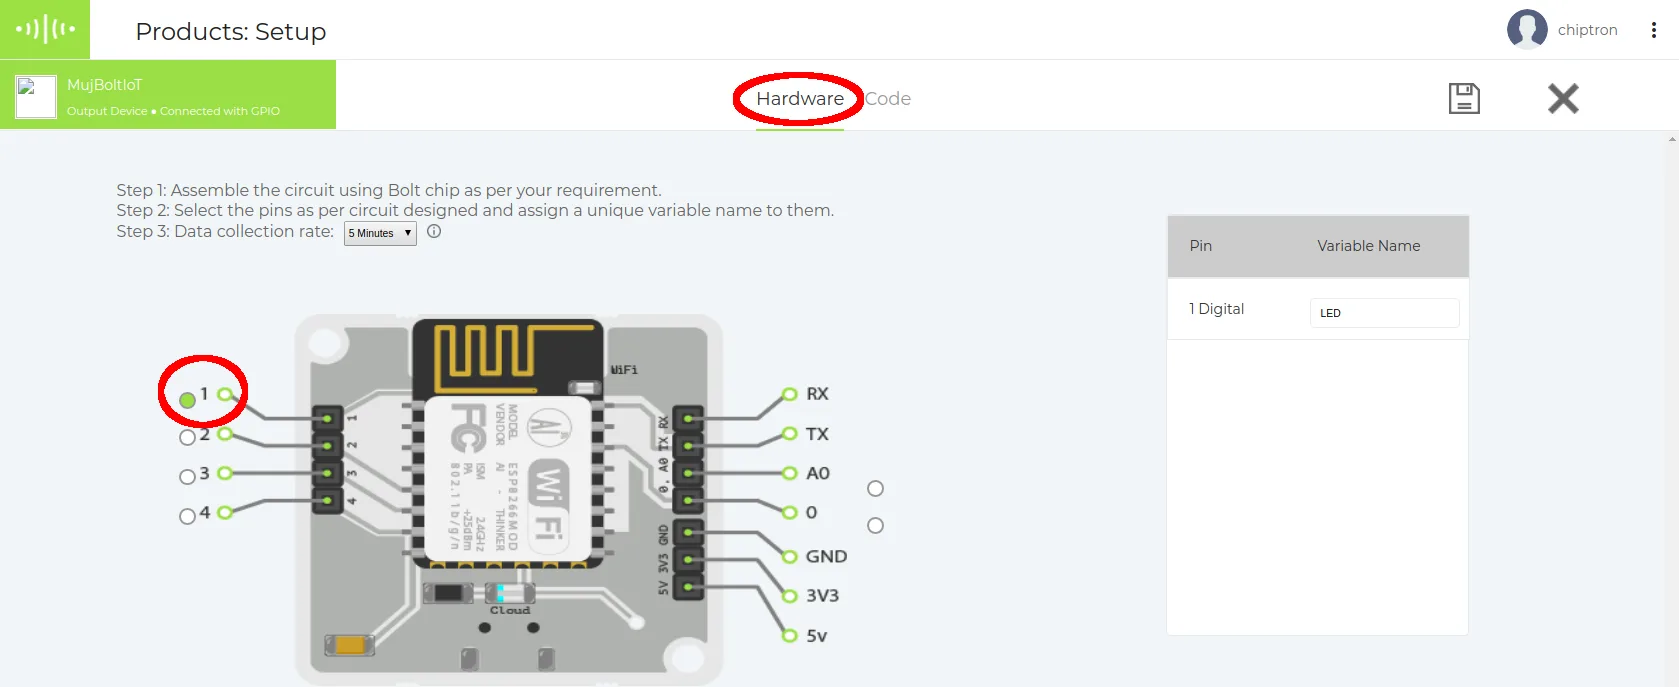
Choose what GPIO you want to use in “Hardware” bookmark. Click to the button at number ONE.
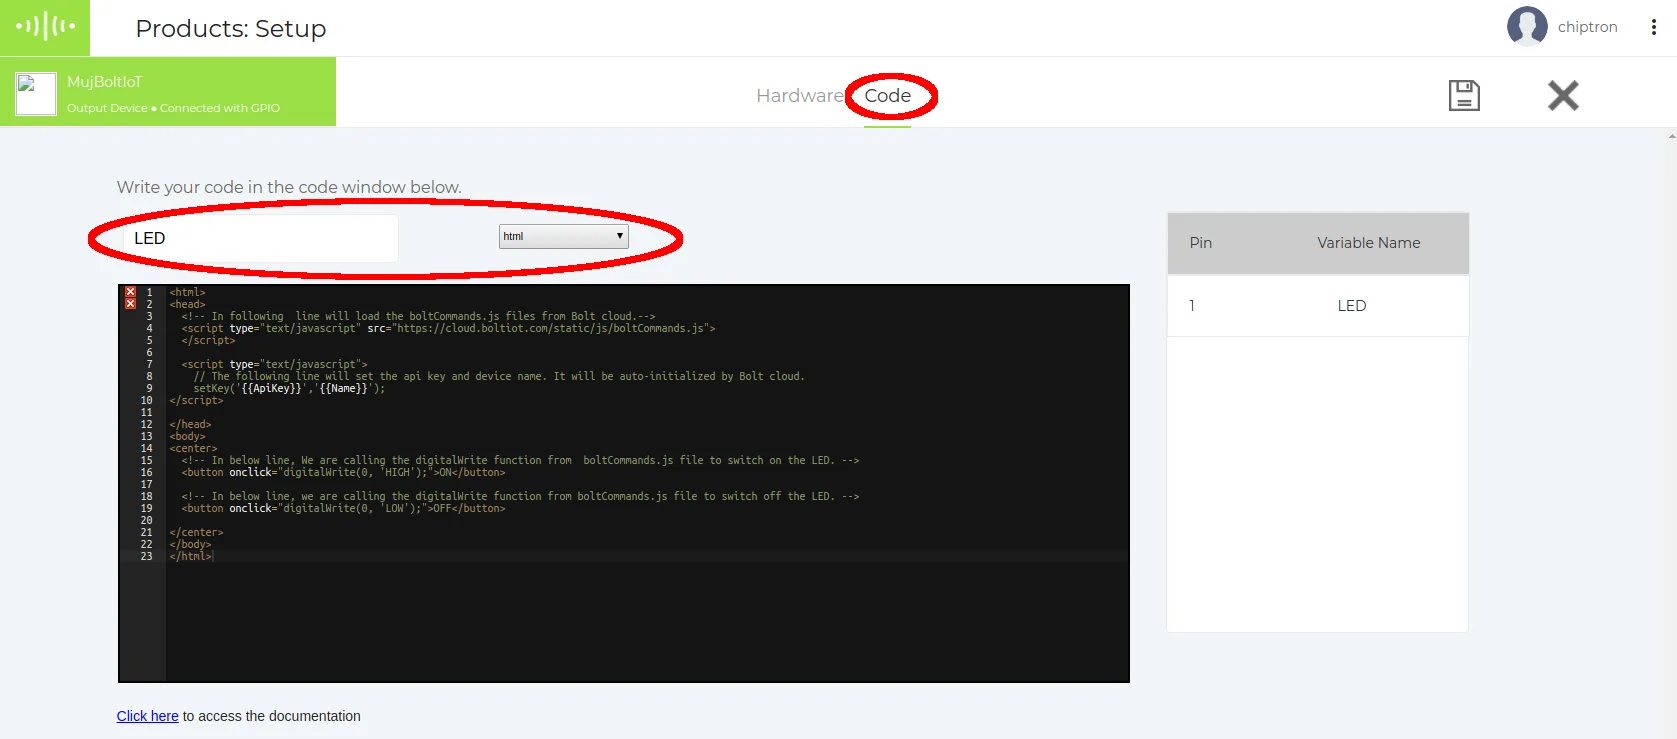
Change the bookmark to “Code“, name the file and fill the code.
Very useful is this file, Quick Start Guide which you find up on this link. You use this example which is mentioned in the Quick Start Guide of Bolt IoT..
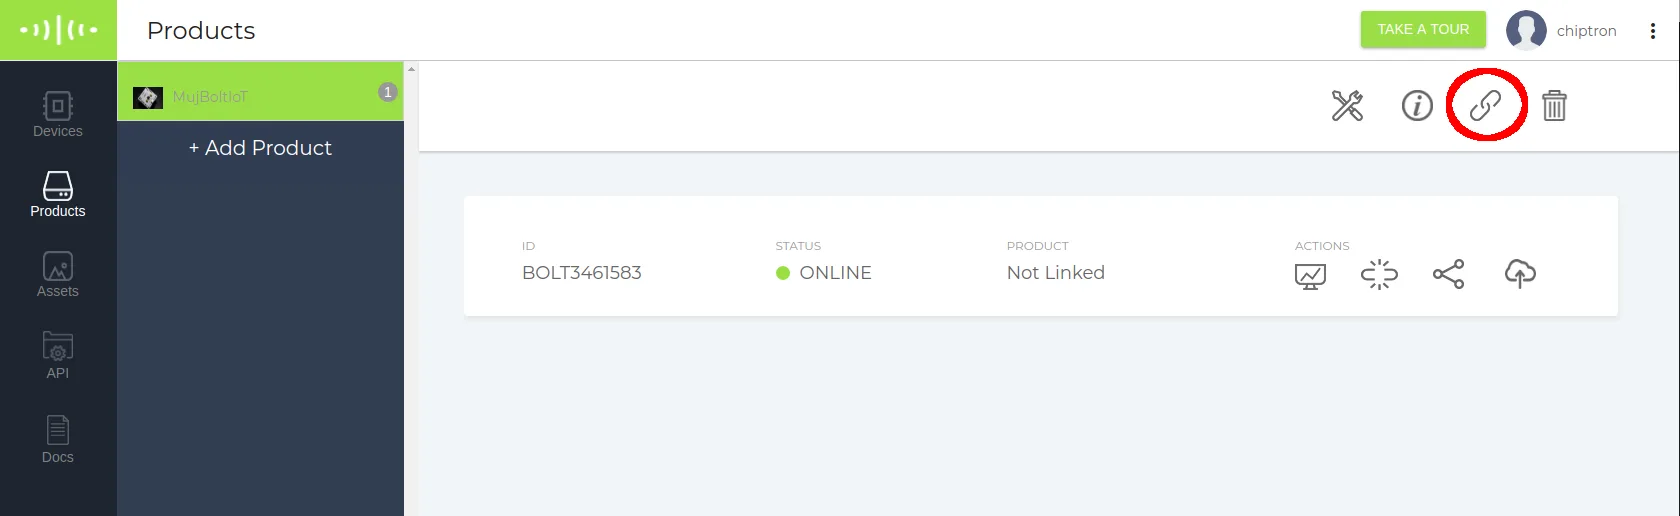
Save the file. The Bolt IoT is “Not Linked“.
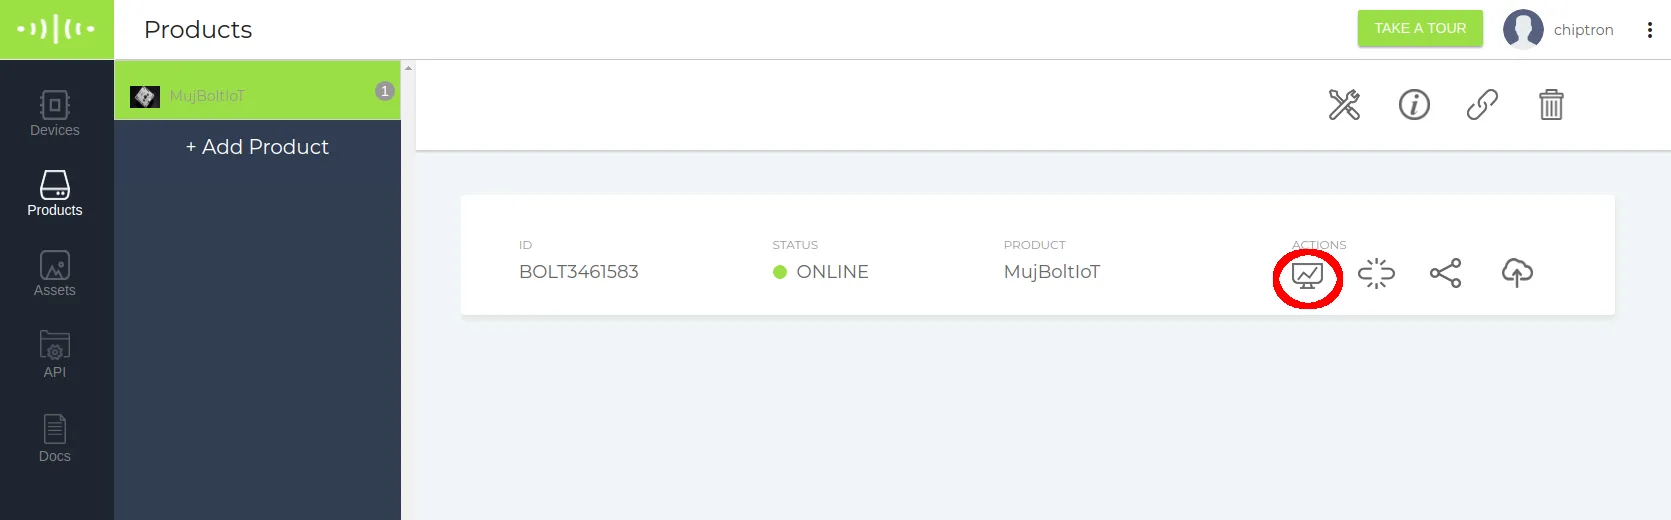
Click to highlighted icon.
Choose your board from the list.
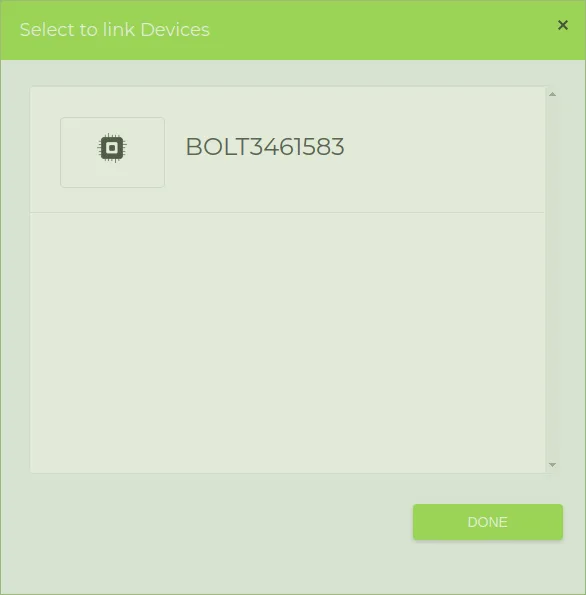
Click to “Done”, now the Device and Product is connected.
The last step, click to “View this device”.
And check this video. Two buttons (ON and OFF) on the website. Control your device from whole world. Thanks to Bolt IoT platform.

