Everybody has meteostation… somebody better, somebody worse. I wanted meteostation too.
I didn’t spend a time with development of sophistic device. My requirements was very easy – measurement temperature, humidity and use SHT75, because I got that as a sample from http://www.soselectronic.com/ (thanks a lot).
I thought about NRF24L01 with STM32, but this idea had a few difficulties. I would need a bridge between NRF24L01 and “ethernet” – some SBC (Raspberry Pi, Cubieboard or another).
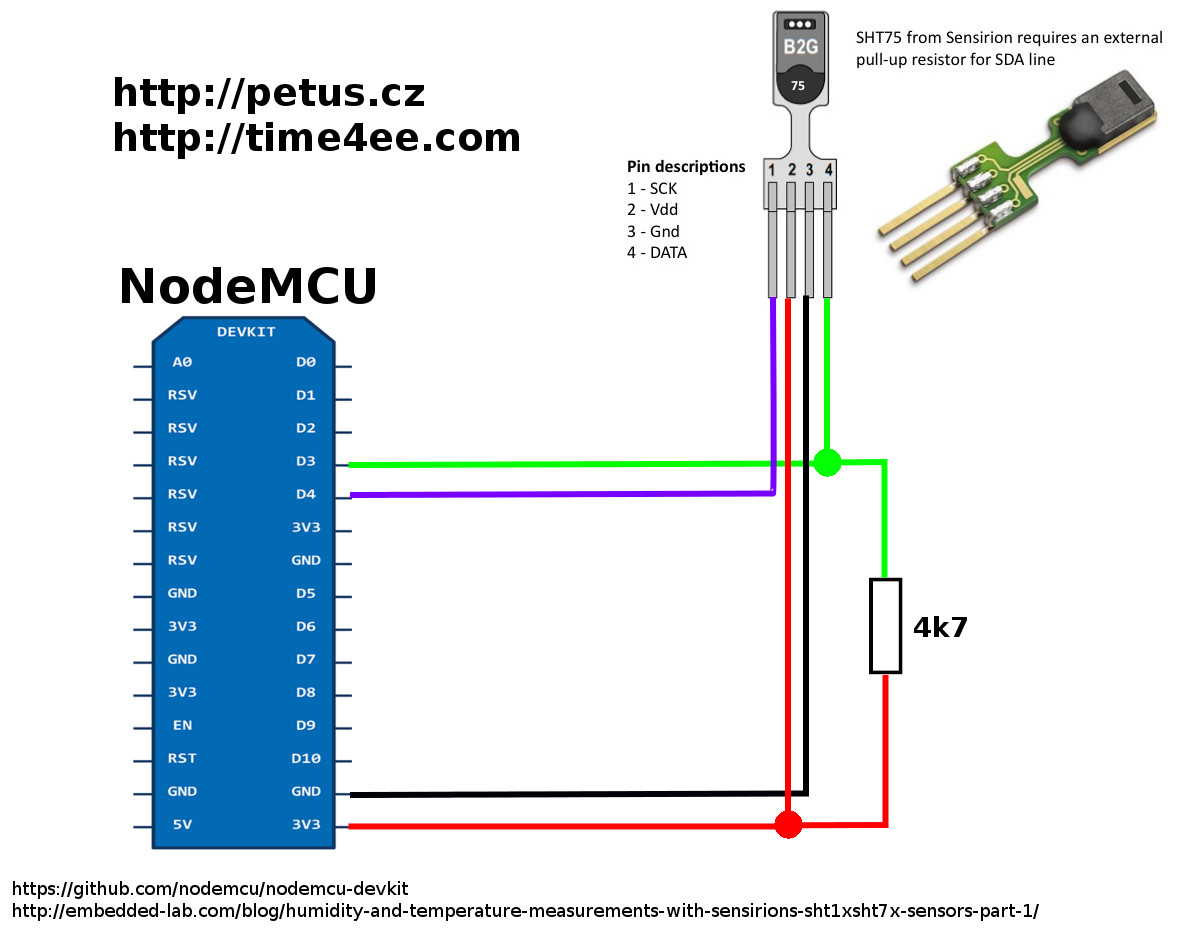
Then I used NodeMCU (ESP8266. ESP-12), I wrote the code in Arduino IDE and I used library for SHT75 and Wi-Fi communication (GET request).
Library for SHT75 (and also SHT71, SHT10, SHT11 and SHT15) was used from https://github.com/practicalarduino/SHT1x
That was very easy, but you have to be careful, definition of pins isn’t xx (number, e.g. 10), but Dx (Dnumber e.g. D2) for NodeMCU.
For the Wi-Fi part of code was used example code from Arduino IDE. You have to add ESP8266 to Arduino IDE – https://github.com/esp8266/Arduino#installing-with-boards-manager
I thought that meteostation (Ok, I know that’s only temperature and humidity sensor, but I can measure it!) will be powered from USB charger, but I found a lot of problems. Power consumption, long power wires, limited range of placing of meteostation and told myself, that have to be powered from battery. But NodeMCU isn’t low power device :-),
I used deep sleep mode. That was very very complicated. I had to use ESP.deepSleep function and connect D0 pin (don’t use RED LED on NodeMCU in code!) with RST pin.
I read, that for lower power consumption, you have to do a lot of steps – unsolder LDO, break one wire blah blah blah… https://tinker.yeoman.com.au/2016/05/29/running-nodemcu-on-a-battery-esp8266-low-power-consumption-revisited/
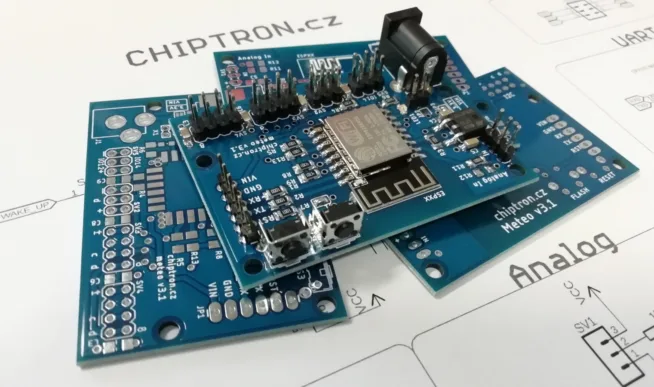
It will be my second prototype – ESP-07 with SHT75 and my daughter board (wait for it 🙂 )
Back to this project. Ok, I am resigned to higher power consumption until I make my second prototype (don’t forget that).
Another problem was with placing of this small meteostation.
Where to place it? I found solution and a few ideas for you.
Don’t put it on …
… windowsill and exterior (hot windowsill or exterior affect your measuring)
… near a window (during ventilation the sensor will be heated – in winter, or cooled – in summer)
… direct shine
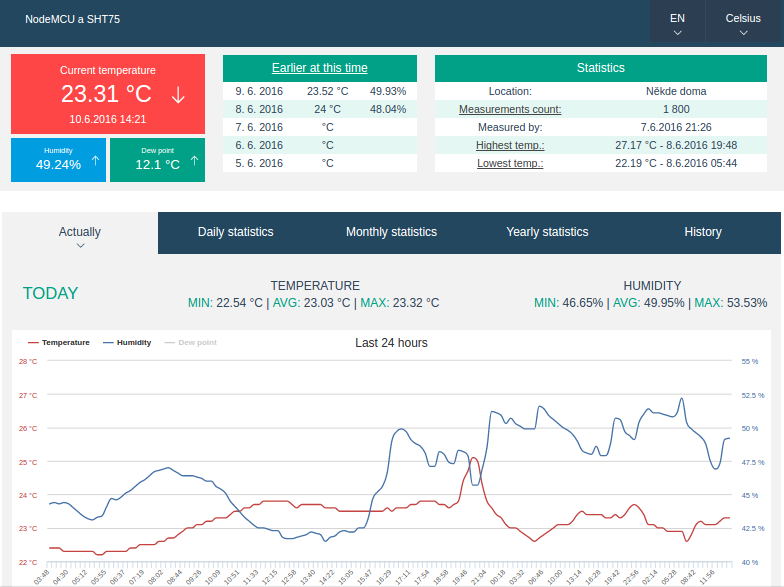
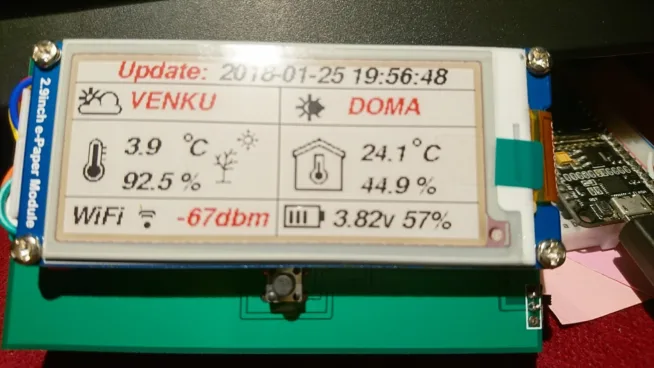
And what is TMEP.CZ?
It’s web application which is used for data logging and vizualization. It’s project by Michal ?ev??k.
The website is only in czech language, but after the setting, the vizualization is enabled in a lot of languages.
Maybe you know https://thingspeak.com/
Why I used SHT75???
Because I got the sample from http://www.soselectronic.com/.
I know, that’s very expensive, but SHT75 is calibrated.
Cheaper solution is using SHT21 or SHT25 – library there.
Ok, a lot of people buy DHT11 or DHT22, but I’m not sure that is it quality sensor.
In the end code for NodeMCU and schematic. DOWNLOAD
