You don’t want to install DaVinci Resolve or pay for a subscription just to cut together a few workshop clips and add a title and some music. Online editors want you to register, upload your video to their servers, and put a watermark on the export. That’s why I built a video editor at video.chiptron.cz: it runs entirely in your browser, your files stay on your device, and you can download the result as an MP4.
The editor is free and has no ads. If it saves you time, I’d be glad of a coffee.
How it works
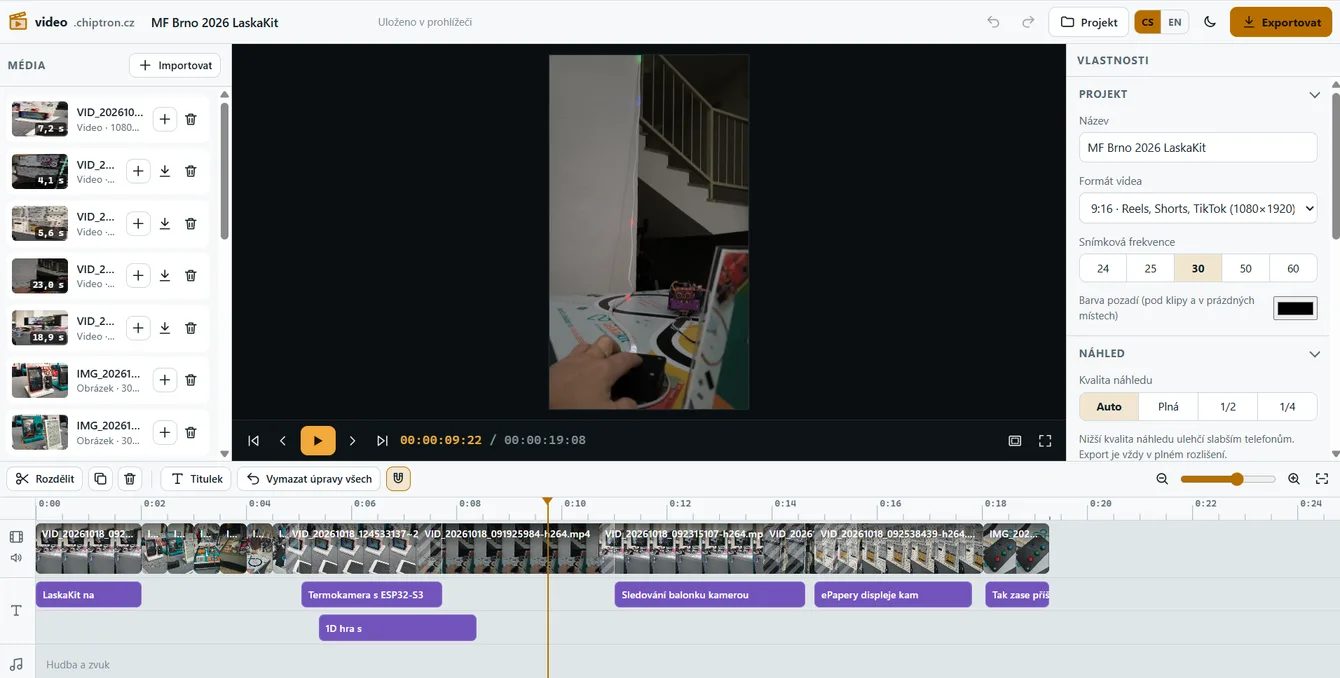
Drag your videos, photos, and music into the window. The editor saves them in your browser’s storage (IndexedDB), so if you close the tab and come back later, your project is right where you left it. Nothing is sent to a server, even when you export.
The layout is familiar: a media library on the left, preview in the middle, settings for the selected clip on the right, and the timeline along the bottom. On a phone, the panels stack vertically, so you can do basic edits there too.
If you just want to try the controls first, there’s a sample project with generated images, titles, and transitions. Delete it with one click and start with an empty timeline.
Timeline and editing
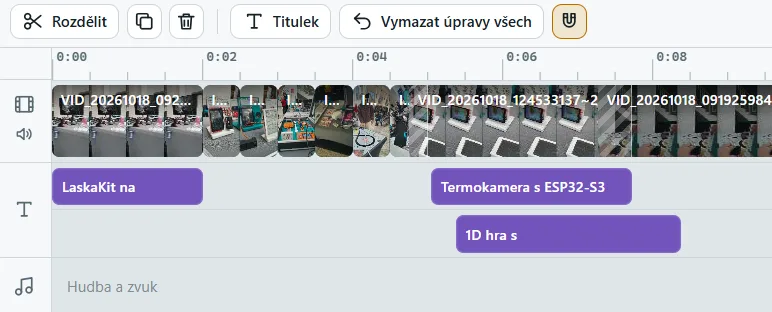
The timeline has three types of tracks: video and images, titles, and audio. Drag clips with the mouse, trim them by dragging their edges, and snap them to the edges of other clips so you don’t end up with a gap of a few frames between shots.
- Split a clip at the playhead with
S, duplicate withCtrl+D, or delete withDelete. - Move frame by frame with the arrow keys, or by seconds with Shift. The timecode also shows the frame number.
- Undo and redo with
Ctrl+ZandCtrl+Shift+Z. History also tracks changes to titles and effects. - Zoom the timeline with the mouse wheel and Ctrl, or click the button that fits the whole project to the window width.
Photos on the timeline work like clips with an adjustable display duration. To keep them from looking static, you can add camera movement (Ken Burns effect): a slow zoom in or out.
Image adjustments, speed, and transitions
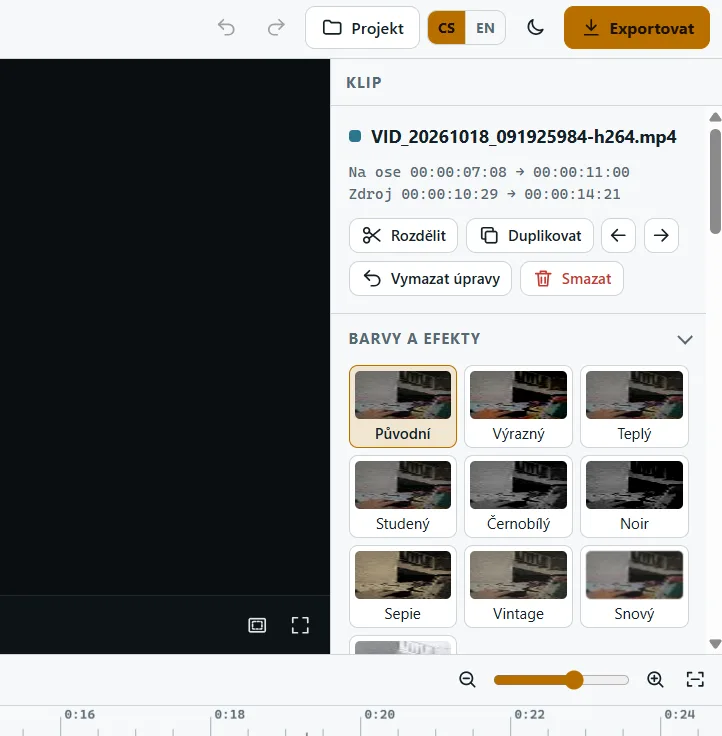
Each clip has its own settings. You can fill the whole frame or show the entire image with borders, then resize, reposition, or flip it. That’s useful when putting landscape footage into a vertical format for Reels.
- Color and effects: brightness, contrast, saturation, hue, color temperature, blur, vignette, black and white, sepia, and invert. There are also ten presets, from Vivid to Noir and Vintage.
- Speed from 0.25× to 4×. The audio pitch changes with the speed, and playback matches the export.
- Clip volume, plus a button at the start of the video track that mutes the audio on all video clips with one click. Handy when you’re putting music under your footage.
- Transitions between clips: dissolve, fade through black, wipes from the left or top, slide, zoom, and circle. You can also fade in from black at the start of a clip and fade to black at the end.
The Clear all edits button resets effects, speed, volume, and transitions to their defaults. Your cuts stay as they are.
Titles on multiple tracks
Add a title with T or the Title button. Enter the text in the panel on the right, then drag it into position in the preview.
- Five fonts (sans-serif, condensed, serif, typewriter, and handwritten), plus color, size, and line alignment.
- Outline, shadow, and background behind the text, with adjustable opacity. White text on a bright sky is hard to read without a background.
- Animation: dissolve, slide up, pop, and typewriter. You can also fade titles in at the start and out at the end.
- Quick positioning with a 3×3 grid, plus title-safe and thirds guides (press
G) so your title doesn’t end up off the edge of a phone screen.
Titles can overlap in time. If you add a second title where one already exists, the editor creates another track for it on the timeline. That way, you can have the video title at the top and a shot caption at the bottom. Tracks appear and disappear as needed.
Music and audio
Drag music onto the audio track below the video. You can trim and move it, adjust the volume, and fade it in at the start or out at the end. The Trim to end of video and fade out button does both at once: the music ends with the final shot and fades out smoothly.
Formats and export
Choose the project format in settings: Full HD 1080p, HD 720p, 4K UHD, vertical 9:16 for Reels, Shorts, and TikTok, square 1:1, Instagram 4:5, or a custom size. Frame rates are 24, 25, 30, 50, or 60 fps.
There are two export options:
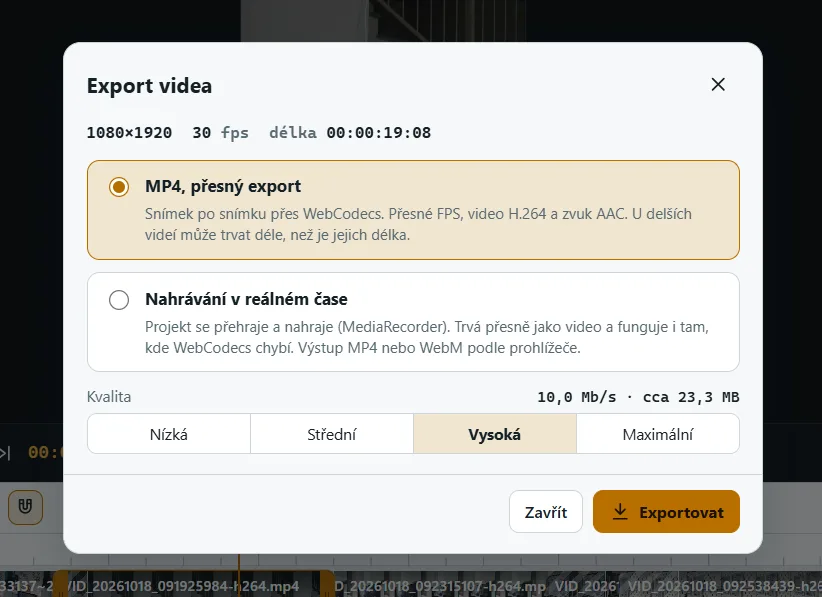
- MP4, precise export renders the video frame by frame using WebCodecs and writes it to MP4 with the Mediabunny library. H.264 video, AAC audio, and an exact frame rate. Export time depends on your computer’s performance, so a longer video can take longer to export than its running time.
- Real-time recording plays and records the project using MediaRecorder. It takes exactly as long as the video and also works in browsers without WebCodecs. The output is MP4 or WebM, depending on the browser.
There are four quality settings. The default, High, produces roughly 10 Mb/s at 1080p and 30 fps, which is enough even for detailed footage from a phone. The dialog shows an estimated file size before export. Keep the tab in the foreground while exporting – the browser throttles it in the background.
Phone video with sound but no picture
This is a common problem. Newer phones record using HEVC (H.265), which Chrome and Edge can’t always play on a computer. It depends on the graphics card and drivers; on some laptops, it won’t play at all. The result: you get sound on the timeline and a black screen instead of video.
The editor detects this during import and offers to convert the video to H.264 right in your browser. The video is decoded by the libde265 WebAssembly library, which is downloaded only when you need it. The converted video replaces the original in the project, and you can download it as an MP4 from the media library – handy for another program, too. If you only want the audio, choose Audio only.
Conversion runs on the CPU, so a one-minute phone video takes a while. Still faster than looking for a converter and uploading your private video to it.
Saving your project
The project is saved to your browser as you work. To back it up or move it to another computer, use the Project menu:
- .json contains only the edits and settings. When you open it elsewhere, the editor will ask you to reconnect the original files.
- .zip bundles all your videos, images, and music into one portable file (up to 4 GB).
Browser storage isn’t unlimited, and in a private window it’s cleared when you close the window. You can check how much space the project is using in its settings.
What you need
It works best in Chrome or Edge on a computer, which support WebCodecs for precise MP4 export. If WebCodecs isn’t available, you can still use real-time recording. On a slower phone, lowering the preview quality can help – export always uses the full resolution. A 4K export on a phone may fail due to insufficient memory.
The editor is available in Czech and English, and has a dark mode. Exported videos have no watermark.
Find the video editor at https://video.chiptron.cz/