A few years ago, I wrote about CookieCAD, which lets you make a cookie cutter from an image. It works well. But the more advanced settings require a subscription, so I built my own tool.
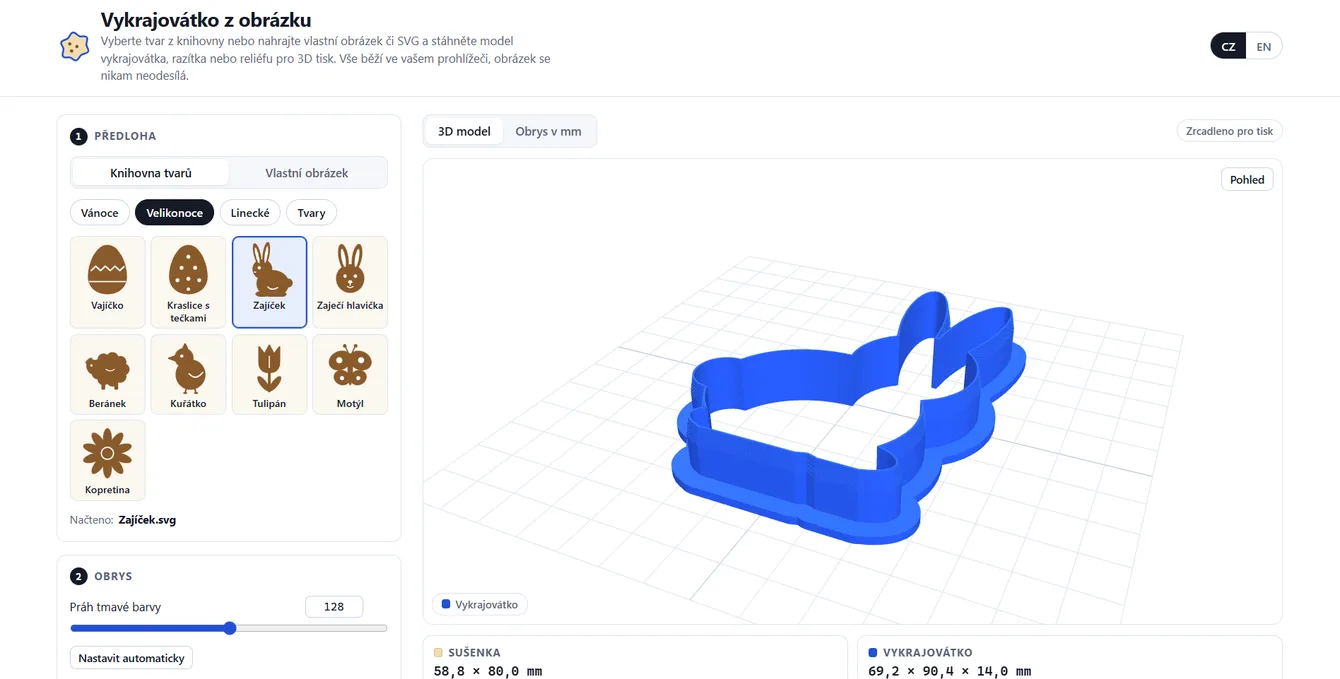
Cookie Cutter from an Image runs entirely in your browser. Upload an image, choose a shape from the library or type in a name, then download a finished model for your 3D printer. It’s free, requires no sign-up, and your image is never uploaded anywhere – everything runs in your browser.
What it can do
There are four types of product to choose from:
- cookie cutter with a beveled cutting edge and a rim
- cookie cutter + stamp, two parts: the stamp fits inside and presses the design into the dough
- stamp on its own, a plate with a raised design
- relief, which simply extrudes an image or SVG into 3D. A sign, name tag, or logo.
You can download an STL for each part, a 3MF with all the parts arranged on one build plate, and an SVG outline with dimensions in millimeters. The preview is shown in 3D or as an outline on a cutting mat with dimensions. That way, you can see exactly how big the cookie will be.
Hundreds of people have tried the beta. If you spot a problem, though, email me at chiptron(at)chiptron[dot]cz
The project is free. If you’d like, you can support me with a coffee at buymeacoffee.com/chiptroncz.
Shape library
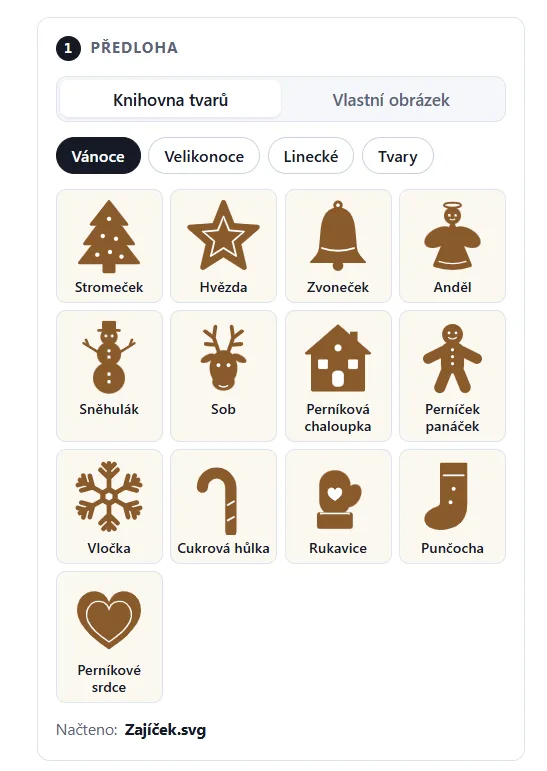
Not everyone has a nice black-and-white drawing handy. So the tool includes a library of 38 shapes, divided into four groups:
- Christmas: tree, star, bell, angel, snowman, reindeer, gingerbread house, gingerbread person, snowflake, candy cane, mitten, stocking, and gingerbread heart
- Easter: egg, decorated egg, bunny, bunny head, lamb, chick, tulip, butterfly, and daisy
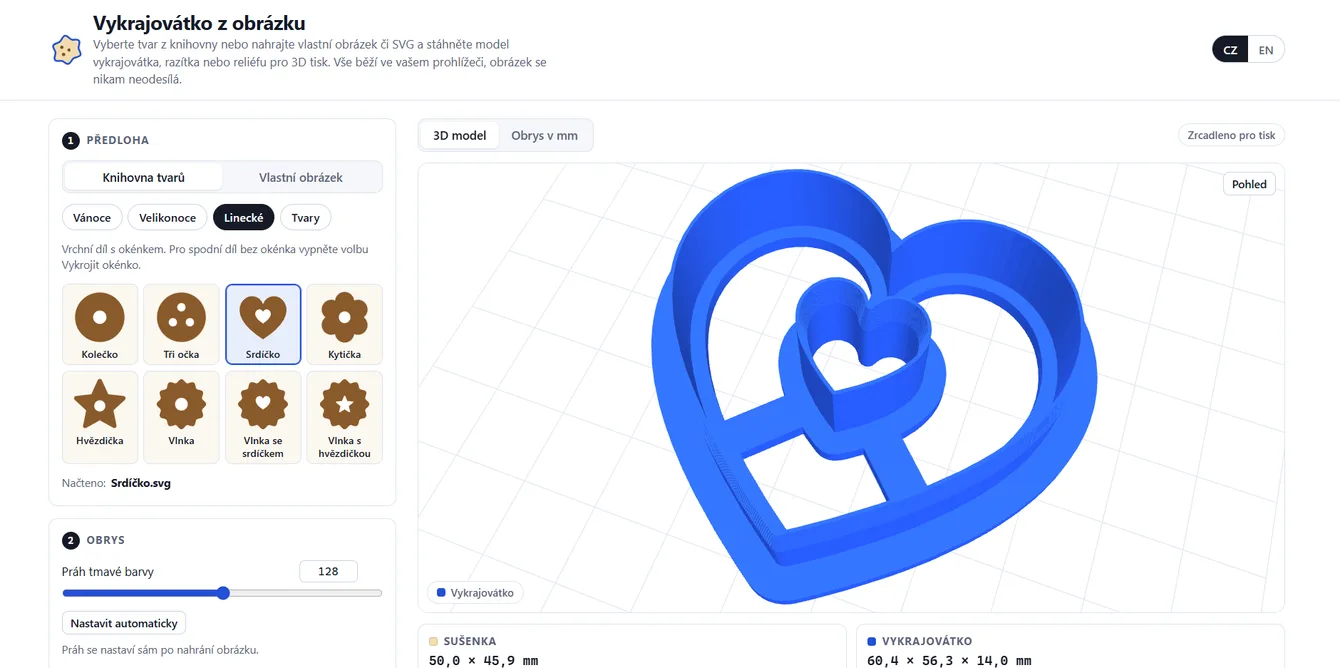
- Linzer cookies: circle, three-hole design, heart, flower, star, and wavy shapes with a window
- Shapes: circle, oval, heart, parametric star, wavy circle, polygon, rectangle, and flower
Parametric shapes have sliders. For the star, you can set the number of points and how rounded they are; for the wavy circle, the number and depth of the waves. Each shape also has a suggested size: 50 mm for Linzer cookies and 70–85 mm for gingerbread.
The library opens to match the season. From October through January, it goes straight to Christmas. 🙂
Linzer cookies with a window
Probably the most useful feature for making Linzer cookies.
The top cookie needs a hole in the middle. For Linzer shapes, the tool therefore generates a second, inner cutting edge. Both cutting edges are joined by a top plate, which stays above the dough while you cut and rests on the build plate during printing. No supports needed.
For the bottom cookie without a window, just uncheck Cut out window. You can make a complete set from the same shape.
Your own image or text
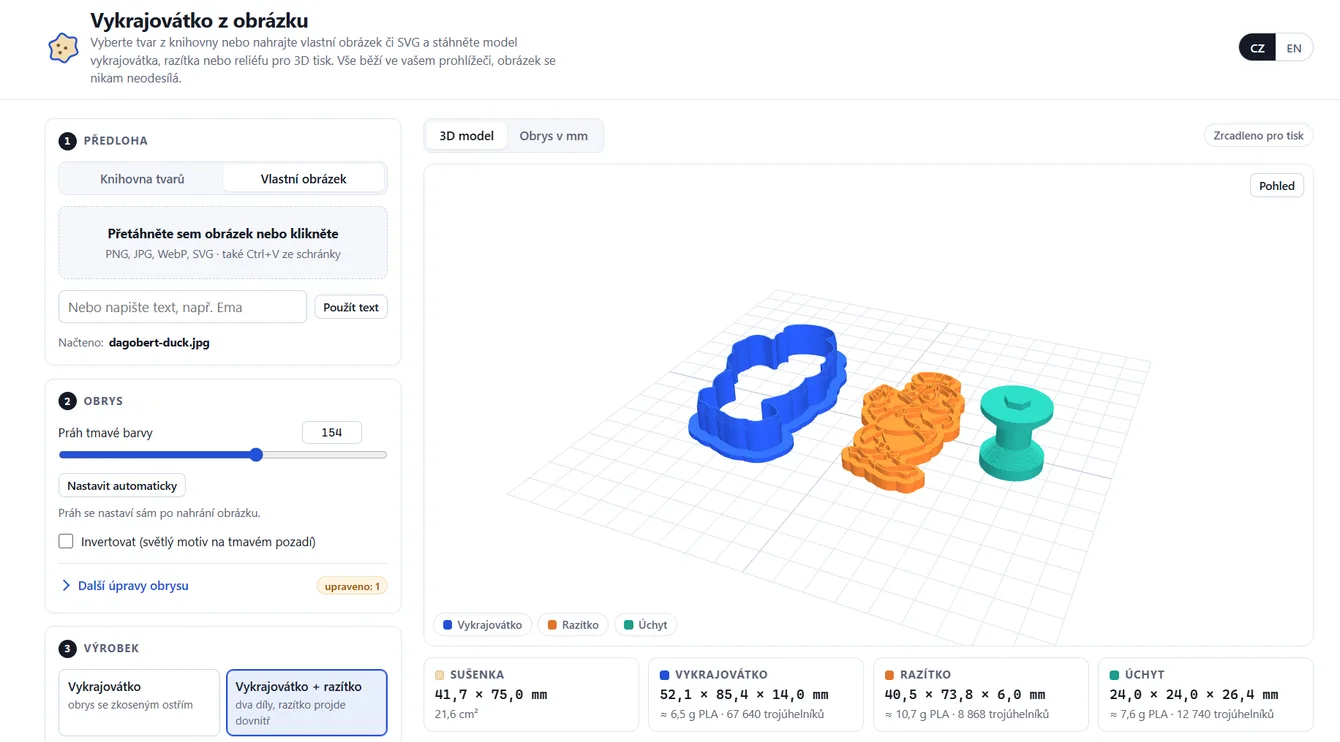
On the Custom image tab, upload a PNG, JPG, WebP, or SVG. You can also drag and drop a file or paste one from the clipboard with Ctrl+V. A black-and-white drawing with a clear outline gives the best results. A photo works too, but it takes a bit more work.
After upload, the dark-color threshold is set automatically based on the histogram. The tool can also detect a light design on a dark background and switch on inversion. Most of the time, you won’t need to touch anything.
If you don’t have an image, type in a name. The tool turns it into a cookie cutter with a border around the letters, so they don’t fall apart into separate pieces.
For photos, Additional outline adjustments can help: smoothing edges, removing small details, closing gaps, adding a border around the design, and keeping only the largest shape. If you’re looking more generally at turning an image into 3D, take a look at my guide to creating an STL from an image.
A cutting edge that slices through dough
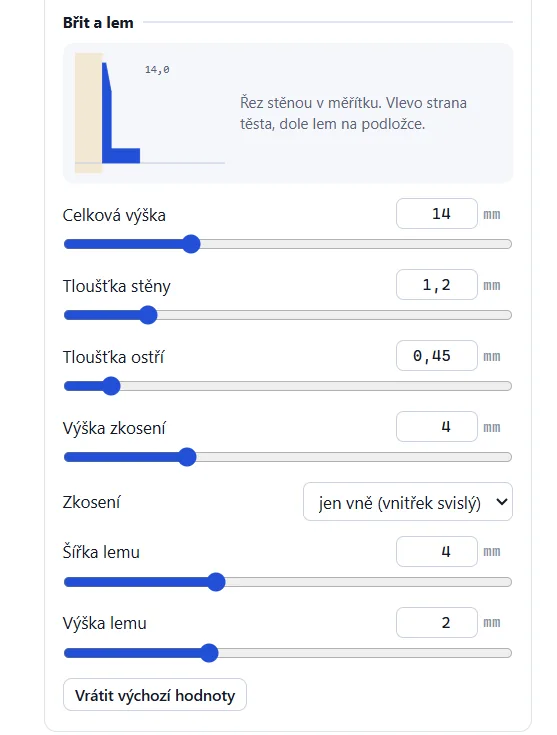
A cookie cutter with straight walls tends to squash dough rather than cut it. That’s why the cutting edge is beveled only on the outside. The inner wall stays vertical, so the cookie comes out exactly the size shown in the preview.
Default settings: 14 mm height, 1.2 mm wall, 0.45 mm cutting edge, a bevel on the final 4 mm, and a 4 mm-wide rim. You’ll find all of these in the expandable settings section, along with a to-scale cross-section of the wall that updates as you move the sliders.
WARNING! A slicer may skip a cutting edge thinner than 0.4 mm when using a 0.4 mm nozzle. The tool will warn you.
One more thing people often forget. The cookie cutter and stamp are used with the cutting edge facing down, so an asymmetrical shape or text would come out reversed on the dough. The model is therefore automatically mirrored. It doesn’t matter for a heart, but it does for a name like Emma.
Stamp and handle
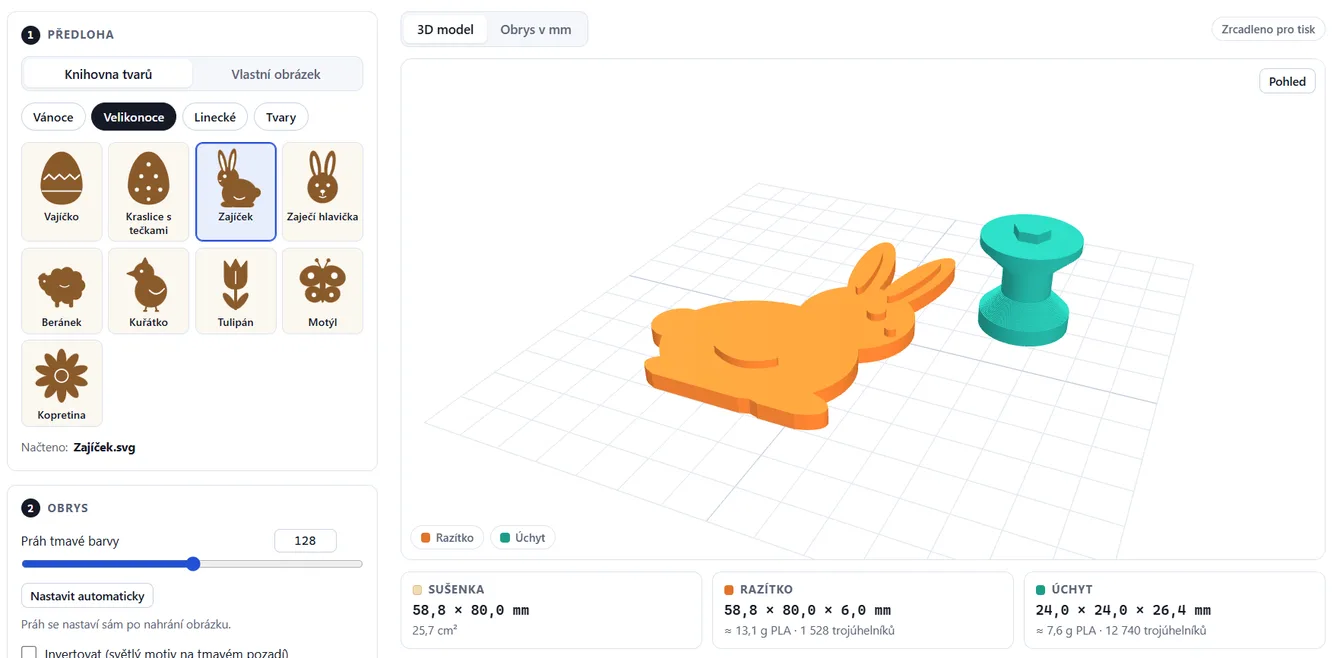
In a cookie cutter + stamp set, the stamp is 0.6 mm smaller to leave clearance, so it fits inside after you cut the shape and presses the design into the dough. Raised areas are selected automatically, or you can choose whether you want the dark or light parts of the image raised.
You can have the tool generate a handle for the stamp: either a knob or a bridge-shaped handle. It prints as a separate part and slides into the stamp with a hexagonal pin that won’t rotate. The stamp plate is thickened to 4 mm to make room for the hole. If the handle won’t fit on a small stamp, the tool will say so and won’t generate it.
Printing
Print the cookie cutter rim-side down, with no supports. A 0.2 mm layer height and 2–3 perimeters are enough. The cutting edge is made from the final layers, so it shouldn’t be narrower than your nozzle.
Print the stamp handle with its top face on the build plate. All overhangs are 45° or less, so no supports are needed here either. If the pin fits loosely, a drop of glue will do.
If you’re not sure which material to use, try the interactive guide to choosing filament. PLA is more than enough for cookie cutters.
Hygiene
PLA and PETG parts straight off a 3D printer are not completely food-safe. Tiny gaps between layers can trap dough and bacteria. It’s fine for a few trays of cookies, but wash the cutter by hand in lukewarm water, don’t leave it in the dough any longer than necessary, and feel free to print a new one next season.
So, should you try it?
I wanted a tool that even my grandma wouldn’t be afraid to use. At first glance, you see just three steps: image, outline, product. Everything else is tucked away in expandable sections, and you can reset it all to the defaults with one click.
With Cookie Cutter from an Image, you can have a custom cookie cutter ready to print in minutes. What shape is missing from the library?