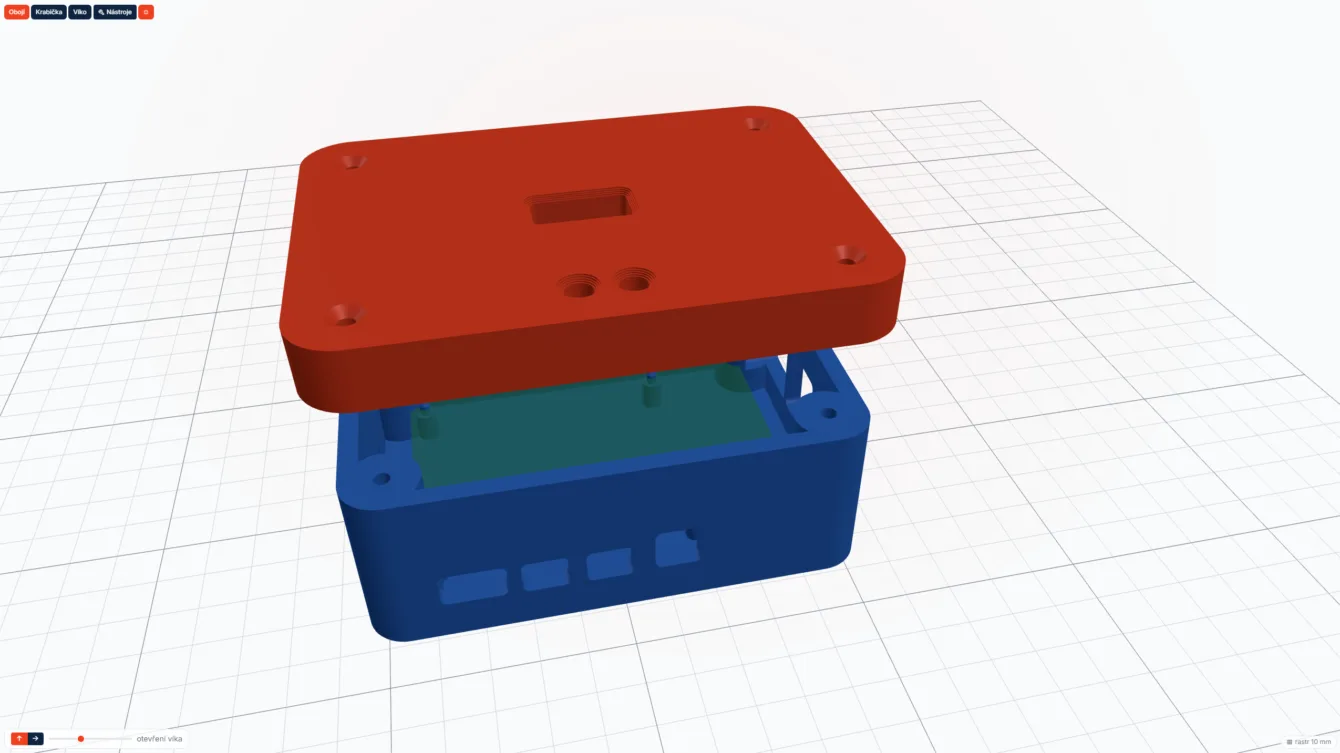
The electronics are done, the board works, and all that’s missing is an enclosure. Open Fusion, draw the walls, subtract the USB openings, figure out where the screw posts go… Or open the Krabix web tool and have an enclosure ready in a few clicks.
Krabix is free, ad-free, and doesn’t require an account. If you don’t have a 3D printer, you can have the enclosure printed by its creator. I designed several enclosures over the last few days, and it’s really good.
Krabix is run by Czech maker Vladimír Večeřa and launched in July 2026. The site also has an English version at krabix.cz/en/. If you need to model a general shape rather than an enclosure, take a look at the Layerling CAD editor, which also runs in your browser.
Using Krabix
Designing an enclosure takes four steps. In the first (Base), enter the internal dimensions or choose a board template – there’s a long list – and the walls are calculated automatically. In the second step, choose a lid. In the third, add features such as holes, standoffs, or text. The fourth step gives you a summary, lets you download the files, and gives you the option to request a print.
You can move back and forth between steps. For access to all the parameters at once, there’s the Full editor. Switching to it preserves everything you’ve already set up in the simplified editor.
If you already have your own board, just enter its width and depth, then click Fit interior. Krabix calculates the internal dimensions so the board fits inside the enclosure.
The preview can show the enclosure, the lid, or both, and you can open the lid too. The Tools menu includes a distance-measuring tool for the model.
Board templates and cutouts
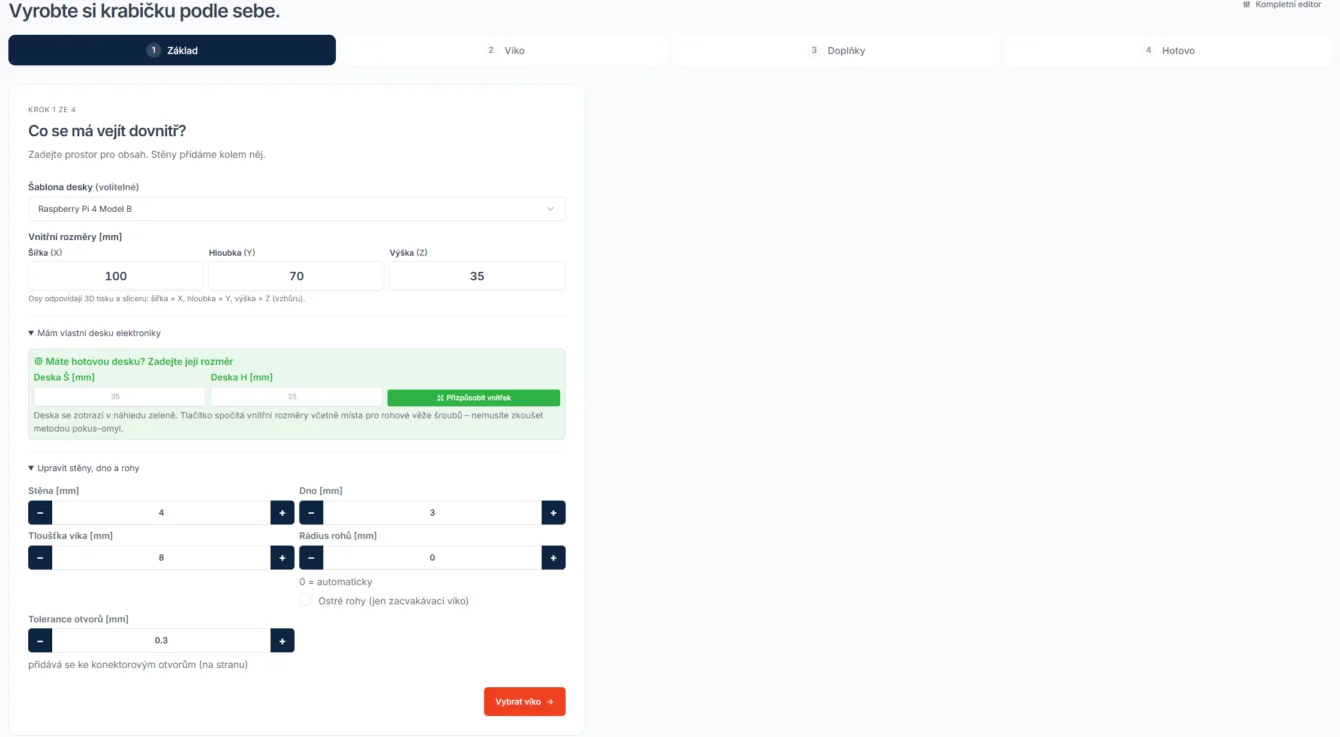
A template sets the dimensions and mounting standoffs for a specific board. The options include Arduino UNO R3, Nano, and Pro Mini; a generic ESP32 DevKit; NodeMCU v3; LaskaKit ESP32-DEVKit / LPKit and ESP32-C3-LPKit boards. The biggest selection is for Raspberry Pi, from the Pi 1 through the Pi 5, plus the Zero, Zero 2 W, and Pico and Pico 2 in versions with Wi-Fi and with headers.
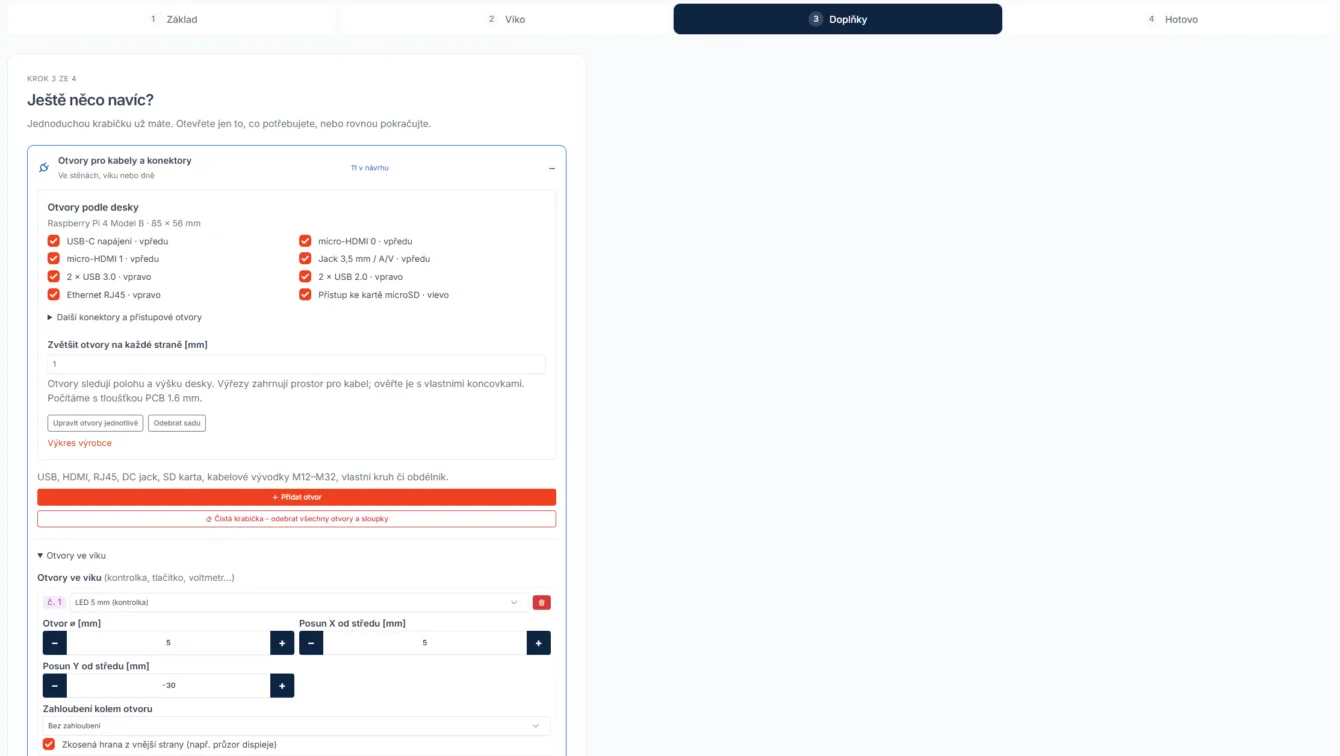
For Raspberry Pi and Pico boards, you can add a set of connector cutouts all at once. For the Pi 4, these include openings for USB-C, both micro-HDMI ports, the jack, USB, Ethernet, and microSD. The Pi 5 also gets a power button opening. Optional openings in the lid provide access to GPIO, the camera, display, or PoE; the Pico gets access to SWD and BOOTSEL. You can disable individual openings or make them larger.
For other boards, you add openings one at a time. Options include USB, HDMI, RJ45, a DC jack, an SD card slot, M12 to M32 cable glands, and oval, circular, or rectangular openings. They can go in the walls, lid, or base.
Lid
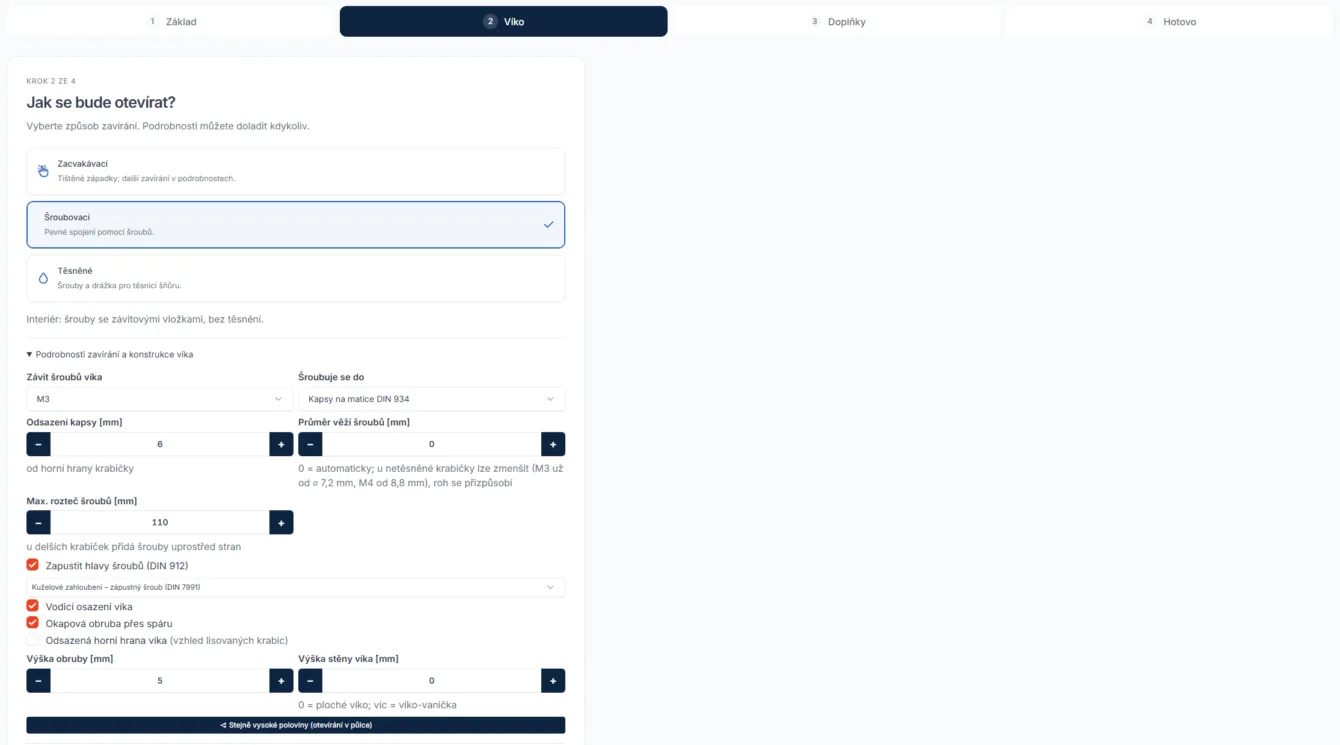
There are three lid types to choose from: snap-fit, screw-on, and sealed. The sealed lid has a groove for sealing cord as well as screws, and is intended for outdoor use. The site recommends the snap-fit lid for indoor use.
The snap-fit lid can be held by catches at the front and back, by a hinge with a catch, by magnets, by magnets around the perimeter, or simply rest in place. The catches can be printed flexures or rotating catches secured with an M3 screw.
You can also set the lid’s rim, its wall height (from a flat lid to a tray), and whether to split the enclosure into two equally tall halves. The lid screws can be countersunk.
Extras
Extras are optional, but there are plenty to choose from in this step, and they’re one more useful than the last:
- PCB standoffs for M3, M4, or M5 threaded inserts, or guide rails for a vertical board that doesn’t use screws
- Dividers, a DIN rail, and a compartment in the lid
- Ventilation grilles and a fan opening
- A display window with a recessed pocket for the panel
- Mounting options for a wall, pole, or DIN rail
Openings in the lid and base can have countersinks – on the inside, for a button cap, for example, or on the outside, to make room for a connector bezel.
You can add text to the lid, base, or walls, with separate size, position, and rotation settings for each item. Czech diacritics are supported too. Text can be engraved or filled with a different filament color. In the latter case, the fill is a separate part in the 3MF file, so you can assign it a different filament in your slicer for multicolor printing.
Download and printing
The final step lets you download a ZIP containing all the parts as STL files. Individual STLs, the 3MF file, and print settings are in a drop-down section, along with an overview of the dimensions and required fasteners.
The lid is exported with its top surface facing the build plate; the enclosure prints base-down. With Optimize for support-free printing enabled, round openings in the walls become teardrop-shaped to keep overhangs under 45°, and screw countersinks are printed with bridging.
The instructions on the website cover printing and assembly, including installing threaded inserts, sealing cord, and cable glands.
Print-on-demand
You can have an enclosure designed in Krabix printed for you. It doesn’t accept custom STL files for print-on-demand.
| Item | Price |
|---|---|
| Black or white PETG | ~$0.11/g |
| Shipping | ~$4 |
The price is calculated from the weight of the design. A 100 × 70 × 40 mm enclosure comes to about $30 including shipping, according to the website. It’s printed in PETG with a 0.2 mm layer height.
Submitting an order is a no-obligation request. The price and lead time are confirmed by email, and payment is by bank transfer after that. The print-on-demand page shows the current queue length.
Prices were correct when this article was written.
Accounts and gallery
Krabix.cz works without an account, including downloading STL and 3MF files and requesting a print. Registration is free and requires a username and email address. With an account, you get:
- A library of your enclosures, sortable into categories
- Automatic saving of designs in progress
- The option to publish an enclosure in the gallery
- An overview of print order status
You can delete your account at any time; your designs will be deleted with it.
The gallery contains enclosures shared by other users. You can sort them by date, number of downloads, or likes. Each one includes the creator’s name and a sharing link. You can open an enclosure from the gallery, edit it, and download it without changing the creator’s original design.